Cave
Plan The Shoot, Shoot The Plan
Gas planning is an essential part of tech diving but how does it apply if you’re planning to conduct a photoshoot in multiple specific locations in the overhead environment of a cave? Arguably one of the most artful cave photographers today, and a high-level tech diver, Fan Ping explains how he calculates gas requirements when making pretty pictures in the dark!
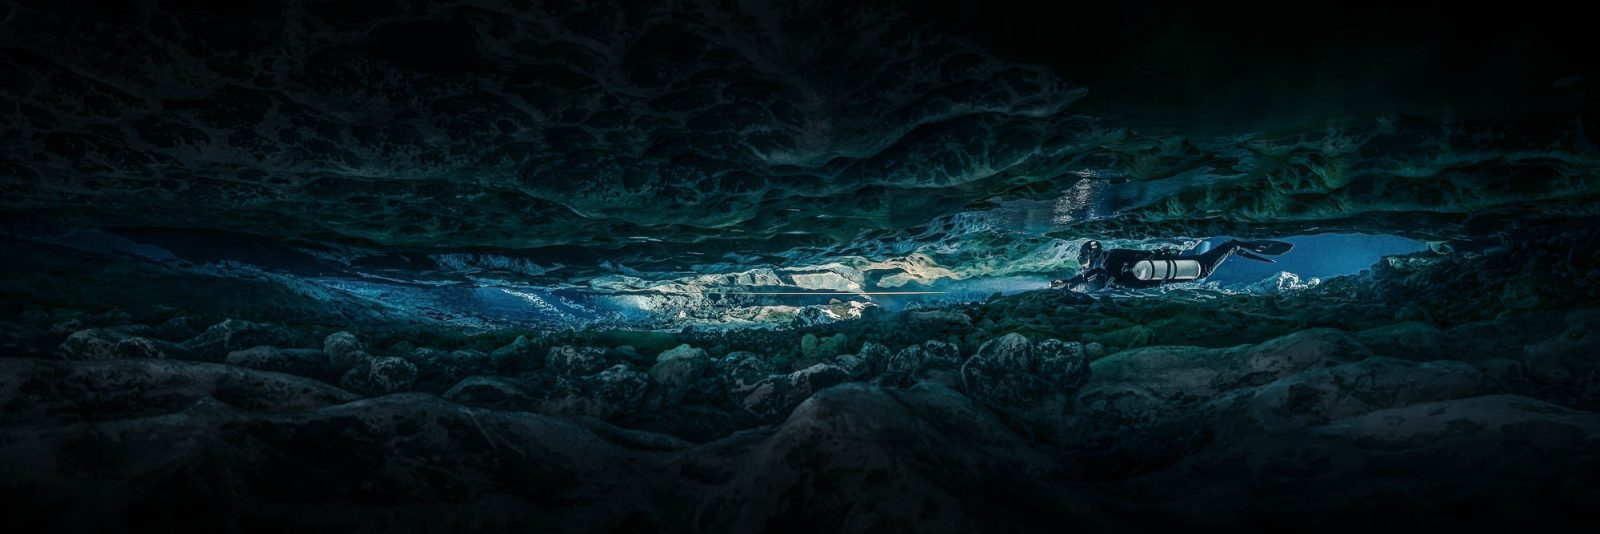
By Fan Ping. Header image: Bedding Plane at Jug Hole by Fan Ping.
Plan the dive, dive the plan. That’s something I have been hearing since the beginning of my diving career but never really mastered until I started my cave diving training with Global Underwater Explorers (GUE). I was surprised by how powerful dive planning can be as a tool, down to a minute, a meter and a few bars. Of course, there is flexibility, but the whole point is you will be aware of what is going to happen next, and have control over the entire process of the dive.
Planning can also apply to underwater cave photoshoots and filming. As a fulltime underwater photographer and director of photography (DP), I plan my shoots in the caves all the time and teach it as a part of my Underwater Cave Photography Course. It definitely makes my job much safer and more efficient. There are two parts of the shoot plan: diving and photography. They work together and can sometimes be complicated, especially when shooting at more than one location. I usually start with the diving part. Knowing exactly where I am going for the photo, I can easily calculate how much time and gas I am going to use to get to the location, and then recalculate a third so I know how much time I have to shoot the photo.
Then I plan the photo part, usually based on a sketch with lighting indicated. Having a sketch of the photo can be very helpful, as it tells me how many lights I am going to need in total and where to put them, both on location as well as when traveling with them. I will also know how much time I am going to need to place and retrieve them, and that adds to the total bottom time too, so I can have a relatively accurate time for actually clicking the shutter.


Plan The Shoot on CCR
It’s the diving part again after the shoot—whether to a second location or to the exit—and in the end, I will have a deco time and total runtime, so I can make sure we are not locked in the park and have somewhere to go for dinner.

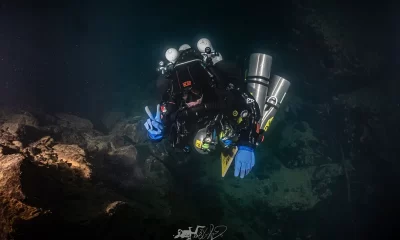
Let’s start with a more straightforward example with one location on rebreather. My buddy Derek Dunlop and I planned a photoshoot at the fissure on Sweet Surprise line in Ginnie Springs. We wanted to scooter to the jump at 670 m/2200 ft on mainline in 20 minutes, drop DPV and sidemount bailout, then swim for another 200 m/656 ft to the shoot location in 20 minutes. The depth of the location is about 28 m/92 ft, which is also the maximum depth of this dive, and the average depth is about 24 m/79 ft before 6 m/20 ft deco, so it was well within our bailout radius, somewhat conservative considering the flow in this cave. (I have LP50 or 7.8L doubles + 1x sidemount 11L, Derek has 2x LP85 or 12L OC bailout. Assume we both have 11L x 2 x 200bar = 4400L OC bailout gas, SCR = 20L/min, ATA = 4, so we have 4400/20/4 = 55min to get back to the cavern. Swim speed = 10m/min, DPV speed = 40m/min, and it will take no more than 40 min in a real situation.)
We plan to shoot until the batteries of the lights die, which will take 40-45 minutes, plus 10-15 minutes to place and retrieve the lights, so it’s a 1 hour shoot at the location. That gives us a 150 minute bottom time plus 25-30 minutes of deco at 6m/20 ft (O2 setpoint: 1.2 bar), 3 hour total runtime.
I usually use the GUE EDGE, i.e., GUE’s predive checklist, for planning, as it is a very good base to start with, no matter if you were trained with GUE or not, and it is very difficult to miss important information with it:
Goals: Photo at fissure on Sweet Surprise line.
Unified Team: Derek diver # 1 and model, Ping diver # 2 and photographer.
Equipment match: Derek has 1 light on tripod, Ping has camera and 4 lights.
Exposure: Max depth 28m, average depth 20m; 20 min on DPV to jump, 20 min swim to shoot location, turn at 100 min. Total runtime 180 min.
Decompression: 30 minutes deco.
Gas: Sufficient OC bailout gas for each diver, 5.7L AL tank filled with oxygen to 200 bar.
Environment: Normal flow.
Plan the Shoot—Open Circuit Edition
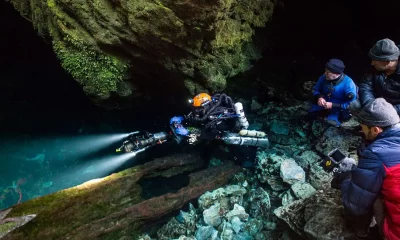
Here is another example of a short but multiple location photo shoot at Jug Hole in Ichetucknee Springs State Park, Florida, with my buddy cave diving instructor Joseph Seda as the model.
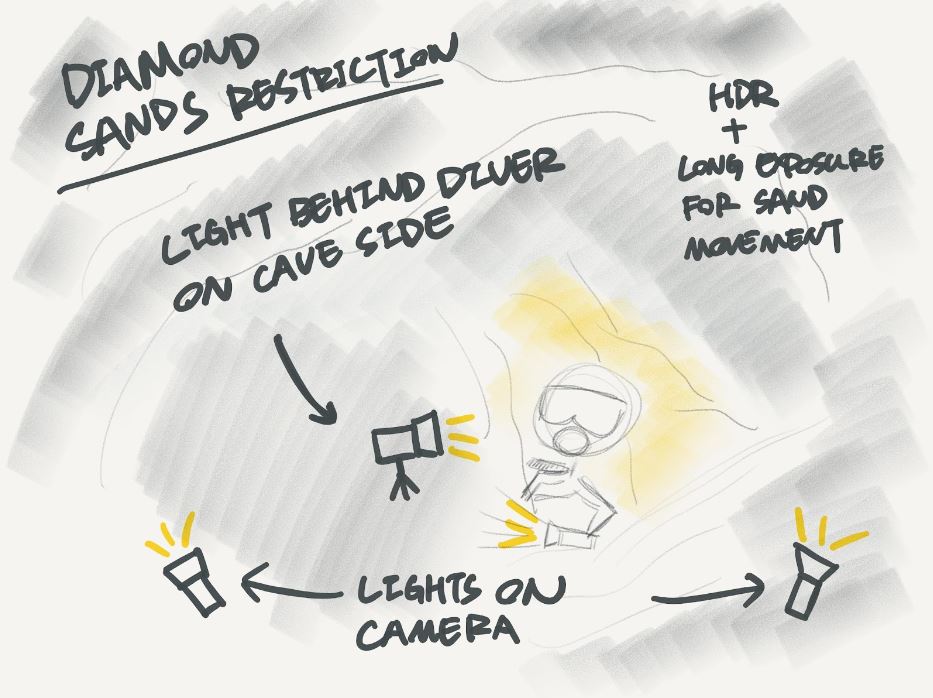
We planned to take a photo at the Diamond Sands restriction first, then an HDR panorama photo in the bedding plane right after the reaper sign, and a cavern shot if not too late.
The Diamond Sands restriction is only 80 m/262 ft on the mainline, but the flow in this cave is strong, and the bedding plane at the beginning is very low, so my swim speed would be about 8m/s, and it will take me 10 minutes to get to the first shoot location from the cavern.
Average depth for this part is about 15 m/49 ft, maximum depth is 22 m/72 ft at the restriction. I have a very standard 20L/min SCR, so with 2 sidemount LP85 steel tanks (12L) I am going to use roughly 30 bar in each tank (5 bar/5 min with 12L doubles) before I can start playing with the lights.
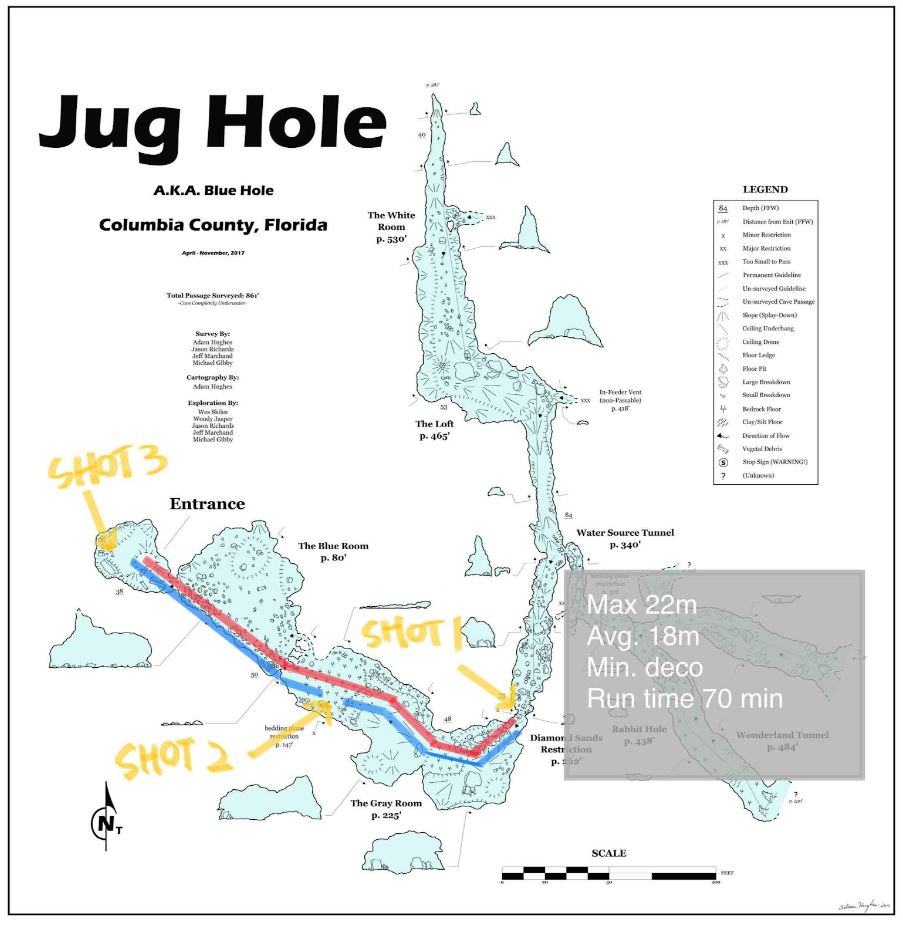
My tanks are filled with 32% to 260 bar (welcome to cave country!), so theoretically I have 260-30-30×2=170 bar to use for the first shot, with the depth of 22 m/72 ft, it gives me about 35 minutes before I have to turn the dive.
Lighting is relatively simple here, just 1 light from the model’s back and 2 on the camera, so it will take only a couple of minutes to set up. Diamond Sands restriction is famous for the rolling sands in the flow when a diver passes, and that’s what we want in the photo, obviously from the exit side, and that makes my job easier, as Joseph will be the one placing the light in the back and coming back out of the restriction to pose. So he is diver #1, going in with two lights on tripod (one as backup and for shot two).
Going back to the bedding plane for the second shot only takes about 5 minutes, and getting out of the cave from there will take no more than 5 minutes too, which is about 15 bars in each tank. So usable gas for the second shot is 260-30-170-15-15×2=15 bar.

At 15 m/49 ft it gives me only 5 minutes, and I am supposed to get out of the cave with at least 50 bar in each tank, so we will have to shorten the first shot in order to get the second shot, which is a lot more complicated with 6 lights in total to light up the whole scene.
In the end, we got a shoot plan like this with GUE EDGE:
Goals: Photos at Diamond Sands restriction and in bedding plane.
Unified team: Joseph diver # 1 and model + light monkey for shot 1, Ping diver # 2 and photographer + light monkey for shot 2.
Equipment match: Joseph has 2 lights on tripod, Ping has camera and 4 lights.
Exposure: Max depth 22 m/22 ft, average depth 18 m/59 ft; 10 min to location one, 20 min for shot 1; 5 min to location two, 30 min for shot two, 5 min to cavern.
Total runtime: 70 min.
Decompression: Minimum deco.
Gas: 260 bar to start, 170 bar to finish shot 1, 80 bar to finish shot 2.
Environment: Strong flow, restriction and sandy bottom at location one, very low bedding plane at location two.
*This calculation is relatively conservative, we have twice the amount of gas we need to get out of the cave at any point.
Plan for Safety
The purpose of planning the photo shoot is to make sure we don’t put ourselves in danger while being too focused on the camera in underwater caves. Open water photography is a lot less stringent in terms of planning; however, overhead environments require more precise ideas for how much time it takes to do the job, especially on open circuit. Good planning also makes the shoot more efficient by reducing unnecessary communication and setting up the scene as a team, which eventually leads to a safer dive. There is not one single photo worth a diver’s life, but there are countless caves that are worth diving with a camera
“There is not one single photo worth a diver’s life, but there are countless caves that are worth diving with a camera.”
Dive Deeper
InDEPTH: Cameras Kill Cavers… Again by Natalie Gibb
Here are some of Ping’s other stories:
InDEPTH: Close Calls: I Ripped My Drysuit a Kilometer Back In The Cave by Fan Ping
InDEPTH: Underwater Galaxy by Fan Ping
Fan Ping is a photographer and filmmaker based in Atlanta, Georgia, USA, and is dedicated to showing the beauty of the underwater world to people through his lens. He is specialized in combining artistic elements with nature and complex lighting skills in overhead environments, and this artistic style has brought him international acclaim, including awards from many major underwater photo/video competitions. You can follow his work on Facebook and Instagram: Be Water Imaging.

Be Water Imaging’s Underwater Cave Photography Course is a modular course that includes unique lighting skills and advanced photography techniques in underwater caverns and caves, and shoot planning is a very important part of the course. For more details please check my Be Water Imaging website, and contact Ping at: [email protected].


Dial In Your DCS Risk with the Thalmann Algorithm

Deep Tunnel Workers Go Trimix

La Grande Dérive

California Dreamin’

British Invasion—Thailand Karst Edition 2024

Harnessing the Power of ‘Educated’ AI to Improve Diving Safety