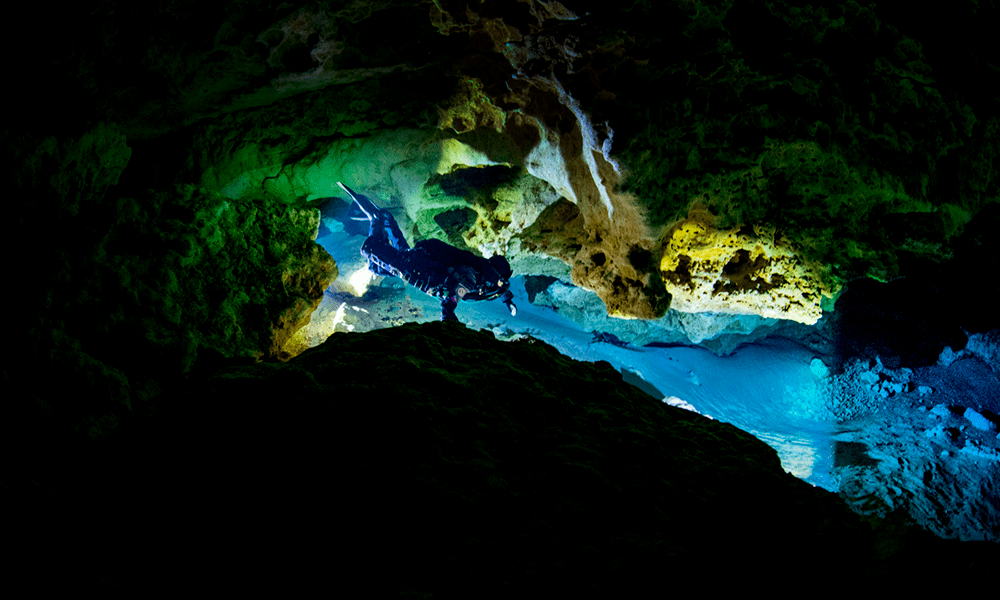
Cave
My Journey Into Sidemount Rebreathers
With a growing number of users making the transition, sidemount rebreathers are the “New New Thing” in diving technology, especially in cave country. Here, award-winning underwater cameraman/photographer Becky Schott, who is also a rebreather and tech diving instructor, explains her motivation and experience finding the right tool for the right job!
By Becky Kagan Schott
When I began diving twenty-five years ago I heard the phrase, “A good diver is always learning,” and in many ways I’ve lived by that motto throughout my entire diving career. I’ve been humbled underwater, and I’ve had days when all of my training and years of experience have come together, allowing me to create inspiring imagery with my camera. I wouldn’t be able to do that without experience and the thirst for knowledge. Leave your ego out of it. I mean, we all have one, but the environment doesn’t care if we are male, female, black, white, young, or old, so your ego won’t help you much, but being humble will. I practice skills frequently. I teach others to stay sharp and pass along my knowledge and most of all, even as an accomplished tech instructor, I am always finding new techniques and trying new things. I still take classes and seek mentorship from more experienced divers. I am always learning.
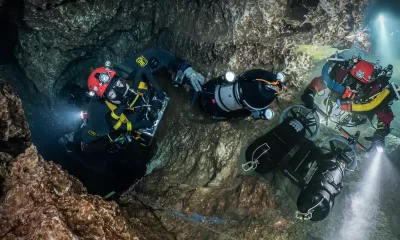
A few years ago while shooting a cave exploration documentary in the Abaco Islands in the Bahamas with Brian Kakuk and Brett Hemphill, I found myself back on open-circuit sidemount, although I prefer to be on closed-circuit rebreather (CCR). We had several stages, and I pushed a large Red Epic Camera along with me. I find open-circuit sidemount to be the most difficult configuration for me to film in. Constantly checking gauges, changing regulators, and moving tanks around, while trying to keep the camera steady and focus on the environment around me, as well as simultaneously directing a team of divers, is challenging. I’ve always enjoyed diving sidemount, and after that shoot I had a handful of other projects that required yet more sidemount diving.

I’ve always felt there is no reason to move on until you have a need to, and after twelve years on backmount CCR, I finally found I needed another tool, a sidemount rebreather. I began a yearlong process of looking at different units, demo’ing some, and talking to explorers and people way more experienced than I in sidemount CCR. For over a decade, one of my best dive buddies, Evan Kovacs, dived a Prism Topaz sidemount unit, and several other dive buddies use them, so I wasn’t that unfamiliar with them. I had a list of options that were important to me, and I began to talk to manufacturers and to watch as more divers started making the transition.
In the end, I chose the Divesoft Liberty sidemount unit because I liked that it is neutrally buoyant and can be clipped off, just like a traditional sidemount bottle with no fuss. It has both onboard diluent and oxygen (O2) cylinders, a water trap in the counterlung that sits up high against your chest, a 5.5 lb radial scrubber (short), and its clean design with the Manual Addition Valves (MAV) running up the loop to the Diver Supply Value (DSV) (i.e., mouthpiece), which makes adding diluent or O2 manually very easy. This is a clean design, and while I’m shooting I’m not fumbling around looking for any MAVs. There is also an Auto Diluent Valve (ADV) that can be activated by just breathing, if you’re in a head-down position or if you need more loop volume. I found that to be really nice for descents. The unit has sophisticated electronics that some divers may like or dislike.
I thought it might be overwhelming, but a lot of thought has gone into everything on this rebreather. I like the built-in checklist and the ability to make a lot of personal adjustments in the menu system. The calibration is easy, and the unit walks you through predive checks, including positive and negative checks, even showing millibars of pressure. I also like that it’s sold ready to dive with little tinkering. Travel is important to me, and the unit is just 50 lbs/23 kg in a pelican case (minus tanks). Lastly, it has several modes that include CCR, manual CCR (mCCR), and a bailout rebreather mode that I may use down the road.
Putting It to the Test
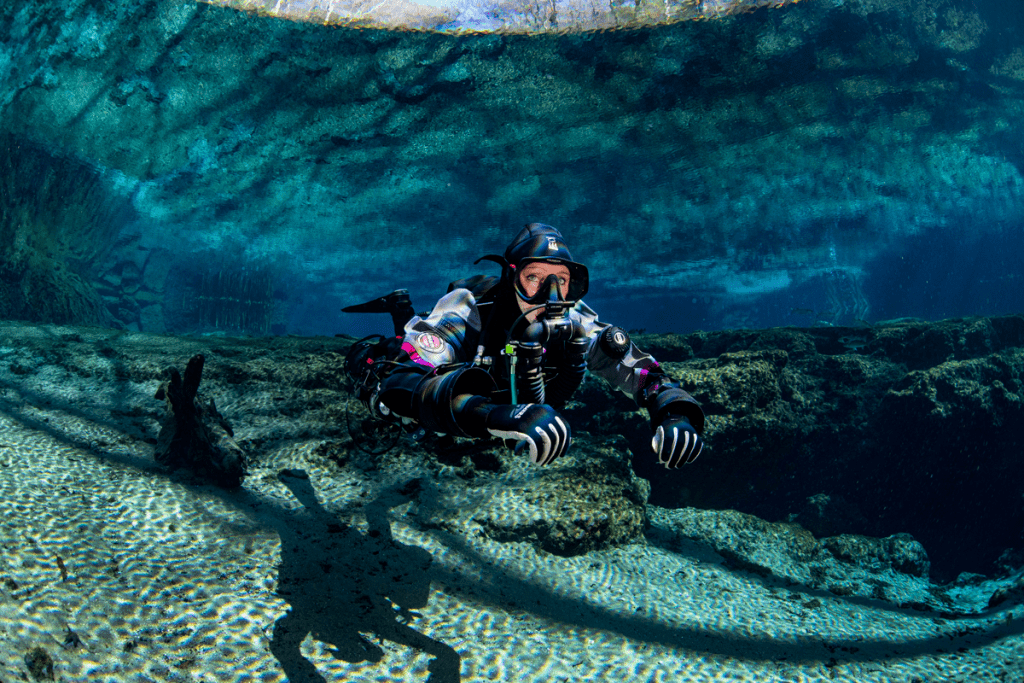
I was nervous about how I’d feel on a sidemount rebreather after years of diving various backmount units. I put the DSV in my mouth and opened it up—at first a little awkward because I was standing on the steps at Ginnie Springs. I went horizontal in the water and descended into the basin. I immediately felt comfortable and made a few small adjustments, like moving the unit to a D-ring further back and adjusting the loop hoses into a more comfortable place under my arm. I couldn’t believe how well it breathed and the ease of activating the ADV or manually adding gas using the MAVs.
After becoming certified on it, I spent another 15 hours practicing skills in open water and then another 20 hours in the first 500 ft/152 m of Devil’s Cave system, just practicing and getting used to the idiosyncrasies of the unit and pulling random drills on myself. Changing set points is easy; I like the vibrating to give you alerts, and the Heads Up Display (HUD) and buddy light are easily seen. I took a camera, and it felt really natural to me. I had fun learning this new tool and gliding through the cave, and it felt really streamlined and clean. It was actually the most comfortable I’ve ever felt in sidemount. I used it with my Hollis Katana harness, and everything trimmed out nicely and felt comfortable in the water.
In my opinion, a sidemount rebreather is an incredible tool, but it doesn’t replace a backmount unit. It’s a tool for a specific environment or purpose. Like any rebreather, it’s important to put the time on it and practice your skills to become proficient.
I spent more time with it back home in Dutch Springs. That was fun, considering it was March and the water temperatures were a balmy 37 degrees Fahrenheit or 3 degrees Celsius. I had no issues with dry gloves, but everything did take me a little longer to get together in colder water, wearing thicker undergarments. I had added Shearwater transmitters and an offboard gas addition supply, since it didn’t come with any. That’s important to me, and I easily added one to the unit. I added the transmitters to clean it up because I found it difficult to read the gauges or button gauges under my arm.
A Belize cave project suddenly came up at the end of March. This is exactly the reason I wanted a sidemount rebreather and a perfect project with friends. I’d been to Giant Cave and Winter Wonderland on several past trips, so I was also somewhat familiar with the systems. I decided I wouldn’t change my configuration too much and continued to dive drysuit, but instead of a steel tank, I went with an AL 80 in the warm water since the unit is neutral.

Giant Cave is an advanced cave system that’s located off the island of Caye Caulker in Belize, and the entry is in the ocean just off a dock. It’s fascinating in many ways, but one thing that can’t be timed is when it’s siphoning or springing. It siphoned every time I entered the cave that week, making visibility less than 2 ft/0.6 m. It’s a challenge because you drop down a hole that narrows into a small fissure crack that you have to go through head down about 40 ft/12m into another open chamber before squeezing through about 100 ft/30 m of restriction that goes up and down sandhills and twists and turns.
There are also other considerations when diving a sidemount CCR, such as water traps; flooding; work of breathing; positioning; bailout planning; and how many cylinders to take and types (H valve or multiple tanks). There is a lot to consider and, as always, more to learn.
Luckily the jellyfish weren’t there this time so they weren’t siphoned in with us! I’ve done this entry almost a dozen times in the past but never in a siphon when I couldn’t see, and never on the sidemount rebreather. I knew the head-down position was going to be tough, and breathing might be hard during that time. I went for it and before getting to the bottom, in no visibility, I got tangled in the line. Inverted and unable to breathe, I signaled to my dive buddy and safety diver Anthony Tedeschi for some assistance. He was on a KISS Sidekick but he’s been diving it for over four years. He helped me out, and I caught my breath as I descended less than gracefully into the open chamber below. I caught my breath easily since the ADV activated, and I manually added diluent to get a proper loop volume. At this point, a lot of sediment was getting sucked into the cave, but we could see the line, and we slowly followed it in, passing crabs, sponges, and little coral pieces. Once through the restriction, the cave opened up into a huge room, and the visibility was clear. We had a good dive and shot some great video that day.
Exiting the cave was a similarly uncomfortable experience, as now I had to go vertical again, but in a head-up position where all the gas wanted to push its way out of my mouth. It’s a different feeling, trying to hold it in and only let out little bits. If you let out too much, you’ll drain the counterlung. The head-up and head-down positions are the biggest things to get used to. Going slightly head up or down is no problem, but being vertical is more challenging.
Each day the entry and exit became easier as I committed to the entry and just went without hesitating. Once inside the huge, clear cave system, I could easily stay in horizontal trim, which is where the sidemount rebreather performs best.
Final Thoughts
I’m so happy I took the Liberty with me to Belize for this project. It’s probably the most challenging cave I’ll ever take it to, and it was a great tool for this particular shoot. We dived for a few hours each day, and I’d usually have only a few tablespoons of water in the counterlung and nothing in the canister. After a week in two different sea caves, both sidemount entrances, I was very happy to have gained experience that was totally different than my dives in the Florida caves on the unit. My plan is to continue to gain hours on it, in all types of environments, so that when opportunities arise, I’m ready and more confident. It’s important to me to have the tools that can help me do my job as an underwater image maker and be safe while doing it. I’m looking forward to putting more time on the sidemount CCR and taking it to some awesome locations this year. So far it’s been a fun new journey practicing, and enjoying silent sidemounting.
DIVE DEEPER
InDEPTH: Picturing History by Becky Sagan Schott (2022)
InDEPTH: Bringing Shipwrecks to Life by Becky Kagan Schott (2023)
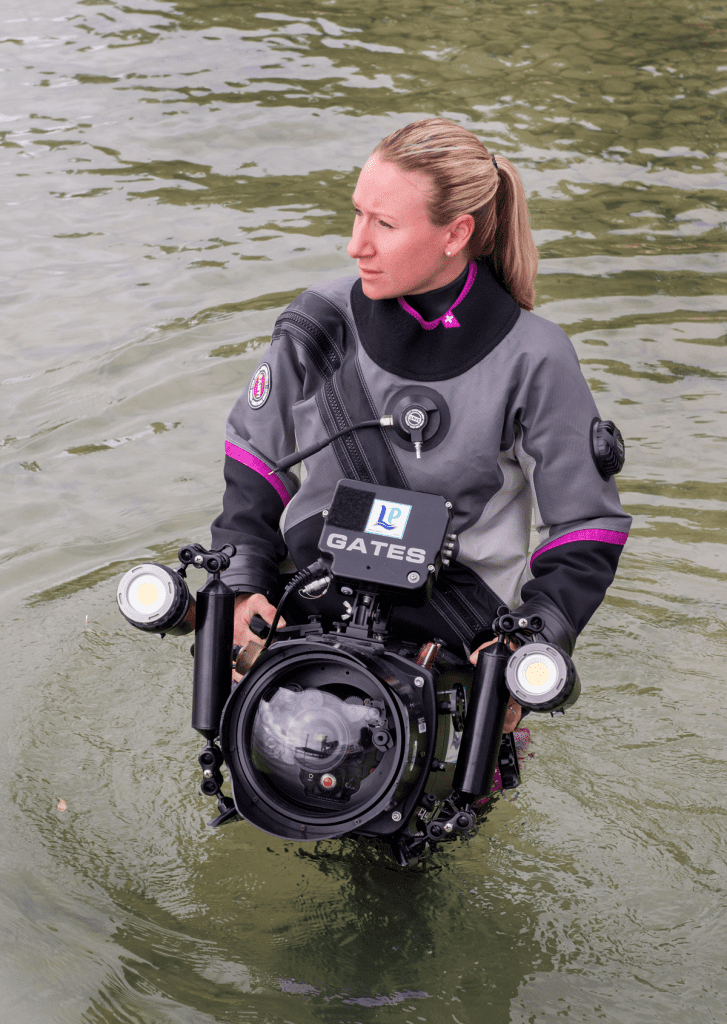
Becky is a five-time Emmy award-winning underwater cameraman and photographer whose work appears on major networks including National Geographic, Discovery Channel and Red Bull. She specializes in capturing images in extreme underwater environments including caves, under ice, and deep shipwrecks. Her projects have taken her all over the world from the Arctic to the Antarctic and many exciting locations in between, filming new wreck discoveries to cave exploration and even diving cage-less with great white sharks. Her biggest passion is shooting haunting images of deep shipwrecks in the Great Lakes. Becky is a frequent contributor to numerous dive magazines, both US-based and international, and her photography has been used in books, museums, and advertising. She is also a technical diving instructor and leads expeditions all over the planet. www.LiquidProductions.com www.MegDiver.com


Dial In Your DCS Risk with the Thalmann Algorithm

Deep Tunnel Workers Go Trimix

La Grande Dérive

California Dreamin’

British Invasion—Thailand Karst Edition 2024

Harnessing the Power of ‘Educated’ AI to Improve Diving Safety