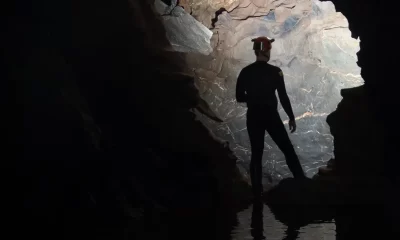
Cave
Zen and the Art of Mexican Cave Navigation
Do you know your arrows, cookies, REMS, TEMS, presence, personal and team markers? Single or in combination? Jump protocols? If your answer to any of these is ‘Nada’ you may find yourself lost in a Mexican cave. Fortunately, underground explorer and instructor Natalie Gibb has agreed to provide safe navigation through the watery wilds of Riviera Maya. Grab your markers.
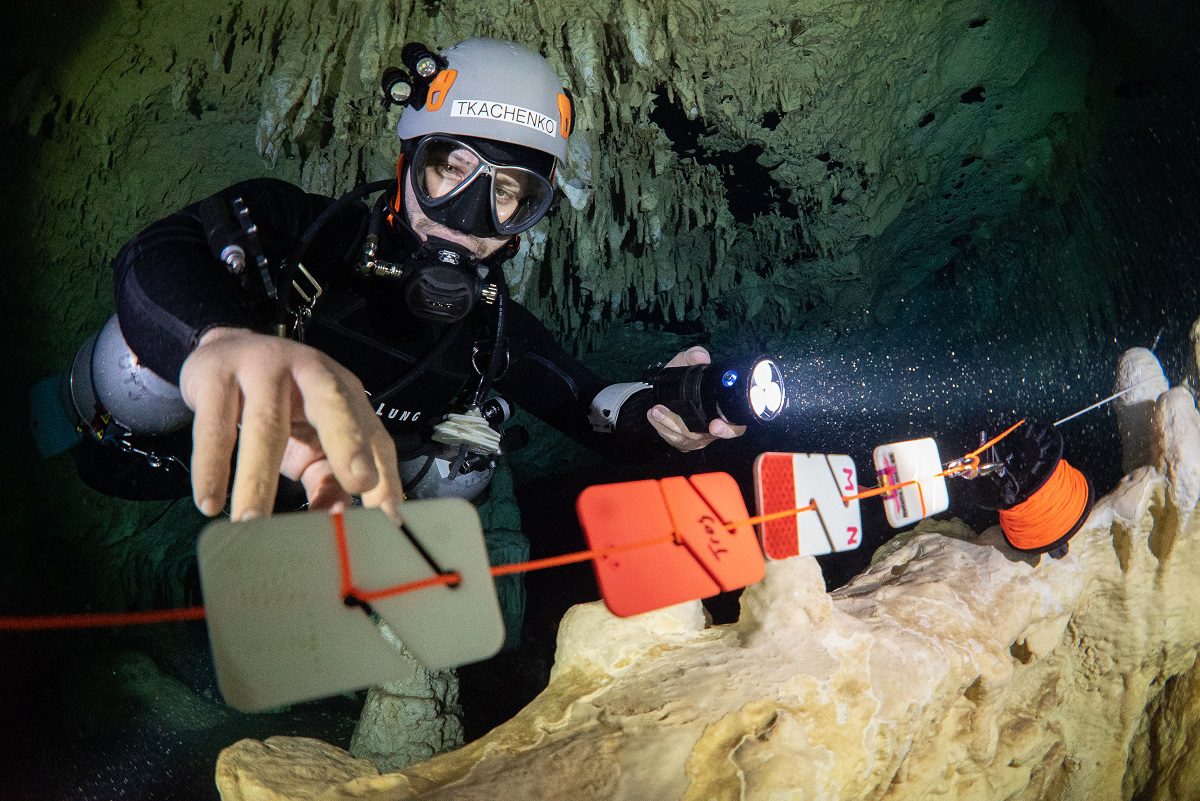
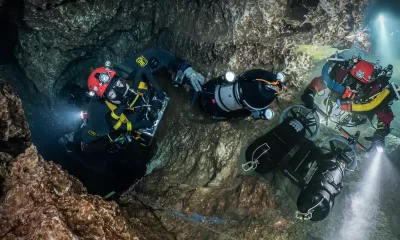
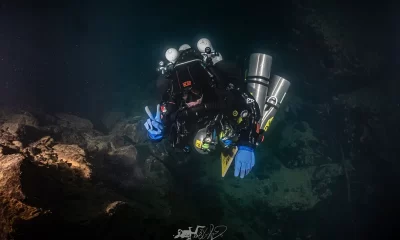
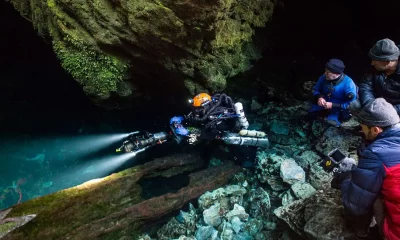
Photos and text by Natalie Gibb
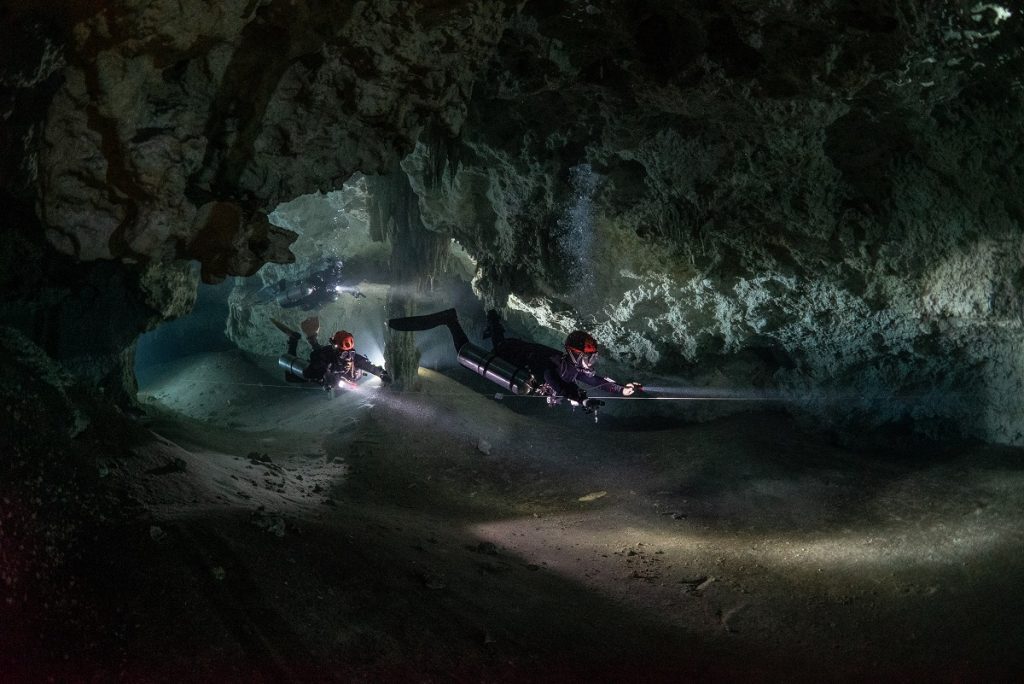
The most idiotic cave navigation mistake I ever witnessed happened on a dive in Cenote Chan Hol about eight years ago. Exiting the cave, my buddy and I approached our jump line, but were pushed out of the way by a solo diver who elbowed his way over our jump line and into the side passageway.
I stared in disbelief: the diver had not installed his own jump spool, he had just swum over mine. Had he even noticed my jump spool? Did he realize he was swimming into a side passageway? My buddy and I both had personal markers on the main line, as well as markers on our spool. My jump spool had a neon green line, and all of our markers were clearly marked with reflective tape and our names. It was not subtle.
I signaled with my light to the solo diver, and gestured, That’s my jump! He shrugged nonchalantly, turned around, swam back over my jump spool to the main line, and trundled on down the principal cave passage. If I hadn’t had a regulator in my mouth, my jaw would have dropped open.
Since that day, I have viewed cave navigation in Mexico as a two-part responsibility:
- Don’t confuse yourself or your teammates.
- Don’t confuse other divers.
As one can imagine, the latter is the more difficult to accomplish.


Cave Training Agency Differences vs Regional Navigation Differences
This article began as a comparison between different cave training agencies’ navigational standards. Interestingly, there is not much to compare! From my research it seems that TDI, IANTD, NSS-CDS, RAID, PSAI, and GUE agree on a basic philosophy: specific navigational markings and protocols are often region-specific and even cave-specific. Every instructor from every training agency I have spoken with has stated more or less the same thing: While agencies may have general guidelines, navigation procedures are left up to the instructor.
As a TDI instructor, my students have mentioned that it’s frustrating not to have exact navigation protocols written out in the textbook. I can understand their annoyance, but from an instructor’s standpoint, I prefer it this way. Not having rigid operating procedures published in training manuals allows cave instructors to teach to their local protocols.
While GUE is perhaps the clearest of all agencies, most training agencies agree on basic best practices, including the need to use personal markers to mark the exit side of intersections, the acceptance of cookies as a navigation tool, and the need to maintain a continuous guideline to the open water by using jump spools and reels.
If regional peculiarities, as opposed to dogmatic navigation standards, dictate protocols, the question becomes: What makes Mexico cave navigation different? How should you navigate there?
What Makes the Caves in Mexico So Confusing?
Several factors make the navigation in Mexico challenging. I believe one of the major factors is that Mexican caves usually lack strong flow. Divers who have grown up navigating caves in other regions are often used to the orienting movement of the water, providing a physical sense of directionality; it’s unlikely to become truly confused about your direction of exit if the water is pushing you “out.” Of course, there are exceptions to this rule, but in general I find noticeable flow is an excellent, almost subconscious indicator of directionality, and it’s missing in most Mexican caves.
The cave systems in Mexico are very complex, with multiple cenote entrances and exits. This may sound like a benefit, but in reality, it’s not possible to exit the water in all of the cenotes, and even if you can get out of the water, you could find yourself deep in the jungle without a road or the ability to call for help. Several years ago, a lost diver perished from exhaustion after blindly following the cave arrows to an alternate exit, then wandering lost in the strong jungle heat.
The arrows in Mexico’s caves are likely to alter directions throughout a single dive, changing to indicate whatever the person who placed the arrows felt was the nearest surface or exit. That person could have been wrong. The route to the “nearer entrances” might involve 16 jumps and a no-mount restriction. The lines could have been cut or changed since the arrows were placed. There are no warnings, and there is no system in place, although we are working on one!
Additionally, Mexican cave navigation follows its own logic, different from that of other regions. We use multiple arrows, directional changes, and pretty much zero distance markers. Areas far back in the cave, or areas that were explored in past decades, may have “reach gaps,” often unmarked jumps that end centimeters from the main line, as well as blind T’s, and other navigational monstrosities. My favorite recent bizarre navigation find was an “H” intersection.
Don’t Depend on the Arrows!
It’s best to view cave lines and arrows as secondary navigational tools. What’s your primary navigational tool? The cave itself.

Plan this out ahead of time if you have a map, and confirm it during the dive by looking back and actually checking your compass once you have completed a jump or T. If you know your directions, you won’t have to rely on the pesky arrows. The magnetic field of the earth is unlikely to change during a single dive. In a pinch, caves north of Chan Hol Cenote are typically upstream to the northwest and downstream to the southeast. This changes a bit south of Chan Hol, due to fracture zones.
Cave tunnels often have a general direction, even if they twist and turn a little. Carry a compass and keep track of which direction you are traveling, in many places it is more or less uniform throughout the dive. You don’t need a degree heading; northwest-ish in and southeast-ish out will be enough to determine your exit direction if you get confused. If you make a 90 degree turn, you should notice the heading change. If you make a jump off the mainline or navigate a T intersection, it’s essential to know the exit direction along the mainline once you return to that point.
Natural navigation is also important. A diver can observe many key features of a cave without a doctorate in hydrogeology. Is the cave big and wide, or small and restricted? What color is the floor sediment? Are there any unusual speleothems that catch your eye? Do you feel water flow? Was there a major depth change? Maybe you swam over a collapse? If you swam into the cave through a small, restricted tunnel, and you turned around to exit but passed no restrictions, you are going the wrong way.
This simple observation would have saved multiple dive teams who all made the same mistake. They entered Cenote Kalimba and made a jump from an arrow pointing away from their exit towards Grand Cenote. When they retrieved the jump spool, they swam toward Grand Cenote instead of Kalimba, through enormous cave passages instead of restrictions. They blindly followed the jump arrow, which was not pointing toward their exit; they did not correct themselves, though the cave passageway they were in was very different from the cave passageway leading to their original exit. The more you can learn about geology, the easier it is to read a cave, remember it, and notice if you are going the wrong way.
Mexican System Markers
Of course, lines and arrows are important to understand, and they give divers information about the general layout of the cave. While there is no standardized system of marking cave lines in Mexico, most caves follow a somewhat logical method. Again, a diver should never assume that the arrows are actually correct or that exits indicated by the arrows are accessible.
In Mexico, jump lines are usually indicated by a single arrow on the main cave line. This is different from Florida, where jumps are often marked with two arrows (a double arrow). Interestingly, double arrow jumps do exist in Mexico, but they are rare and have a special significance – they indicate a particularly important jump, such as a jump to complete a circuit or a traverse. Divers familiar with popular Mexican caves may have noticed this in the double arrow jump to the Death Arrow Passage in Cenote Maya Blue, or the double arrow jump to complete the circuit in Cenote Minotauro.
There are also a great number of secret or hidden jumps that are not marked at all on the mainline. Examples include the jump to the Chinese Garden at Cenote Tajma Ha, or the jump to the Room of Tears in Cenote Carwash.
From a practical standpoint, the lack of double arrow jumps means that line-to-line jump connections are generally not used in Mexico, and a better protocol is to tie into a line marker (more on this to follow.)
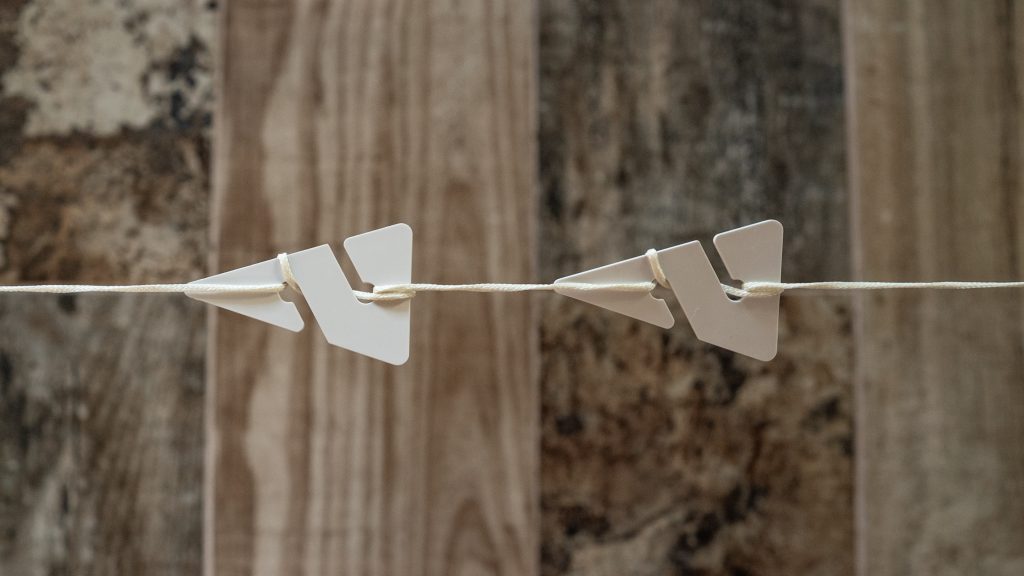
As mentioned above, arrows will often change directions along a single cave line. If you swim far enough into a Mexican cave, it is common to encounter a set of two arrows pointing in different directions. These are commonly referred to as a directional change or opposing arrows. The purpose of opposing arrows is to indicate that there is an exit equidistant in each direction, and to draw the diver’s attention to the fact that the line markers past the opposing arrows will point away from the diver’s original exit.
Similarly, a set of three arrows, with two pointing in one direction and one pointing in the opposite direction is intended to indicate two exits, with one being closer in time or distance. However, keep in mind that system arrows may also flip direction without opposing arrows as a warning. It’s your job to notice this. Common practice is to leave a line marker (cookie or REM) on your team’s exit side of the opposing arrows or first flipped arrow to confirm your direction of exit.
T Intersections. T intersections are generally rare in Mexico. Most navigation is accomplished with jump lines or gaps. T’s are most often present at major intersections, when the cave splits into two equally sized tunnels. At a T, one or more exits are indicated by system arrows pointing away from the T toward the exit. T’s are also common close to cenote entrances, with a double arrow indicating the presence of a cenote off the main tunnel. As with opposing arrows, good practice in Mexico is for the cave team to mark their exit side of the T with a personal marker.

At this point, an important clarification must be made: never blindly follow system arrows toward an exit that you have not personally confirmed. Cave arrows may point toward an exit that requires multiple jumps, a no-mount restriction, or that is blocked by a collapse that occurred after the original line was laid. Sometimes line markers are simply wrong. Always return to your original proven exit regardless of the arrow direction, and you will stay safe.
Personal Markers
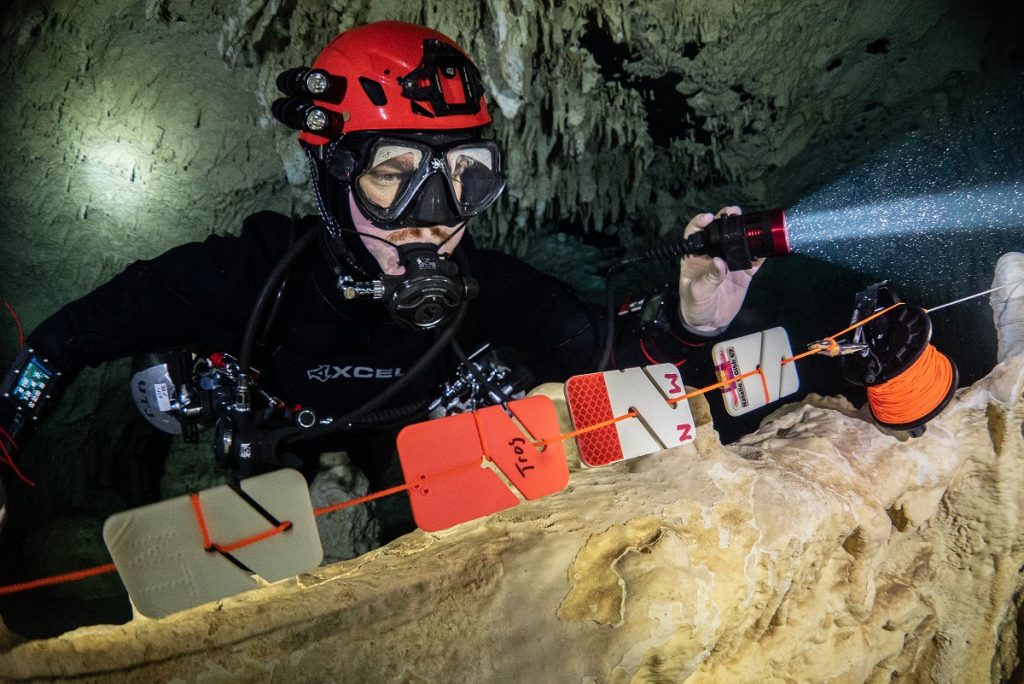
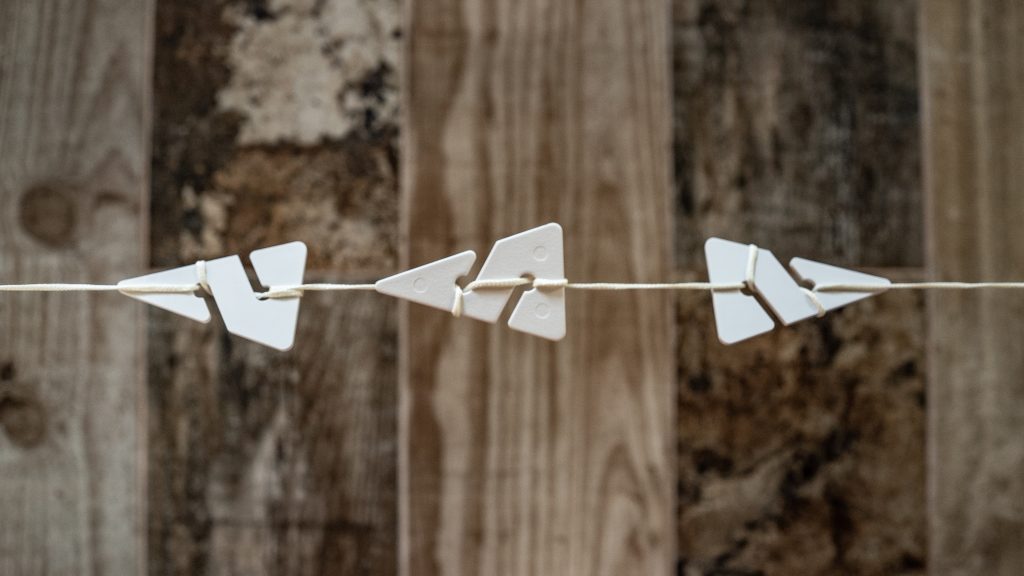
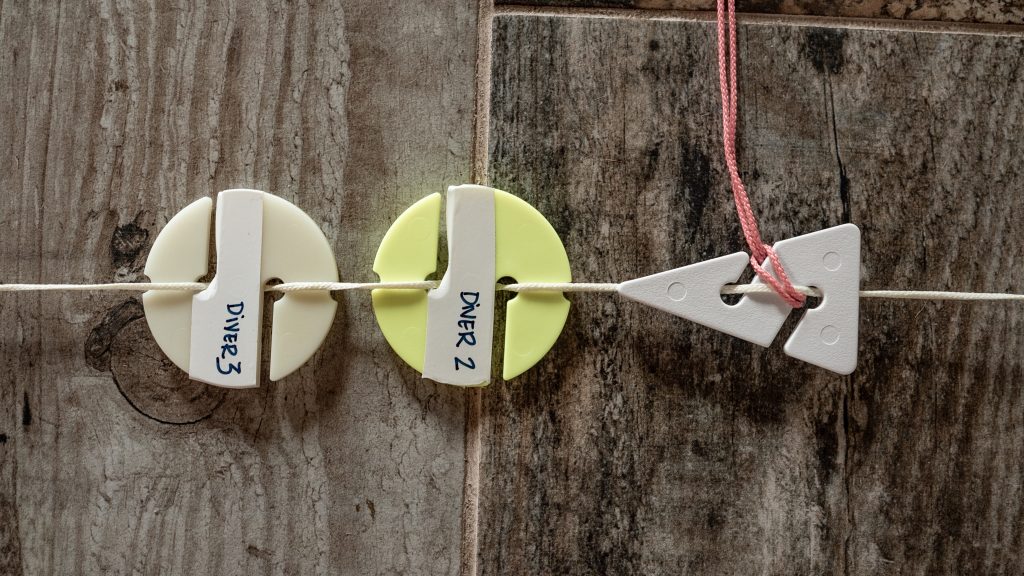
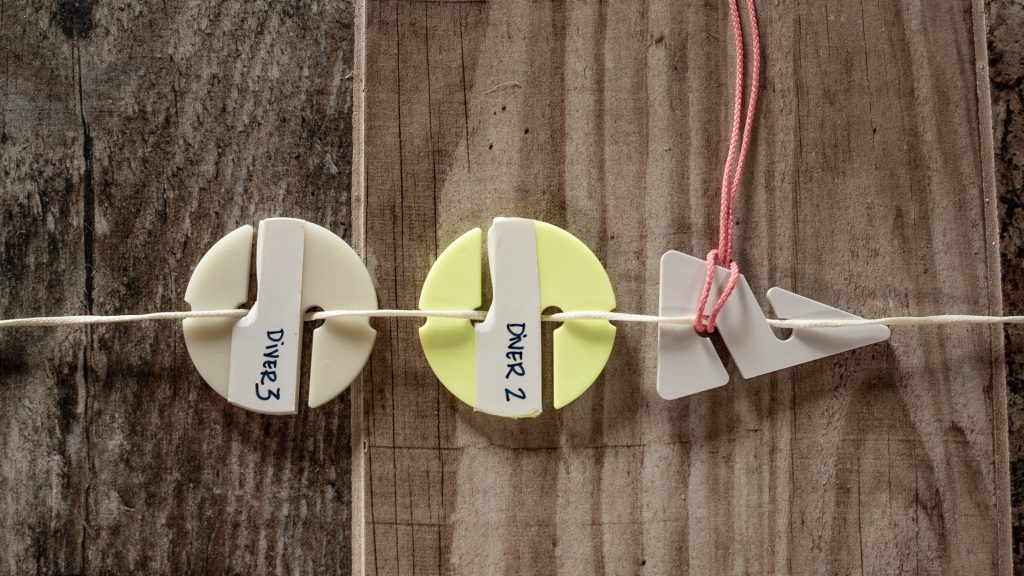
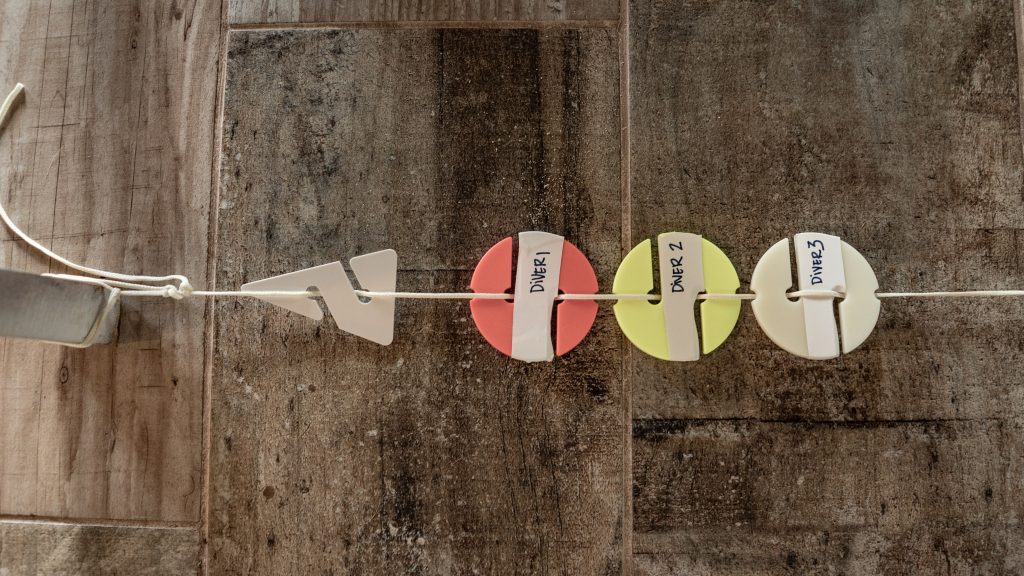
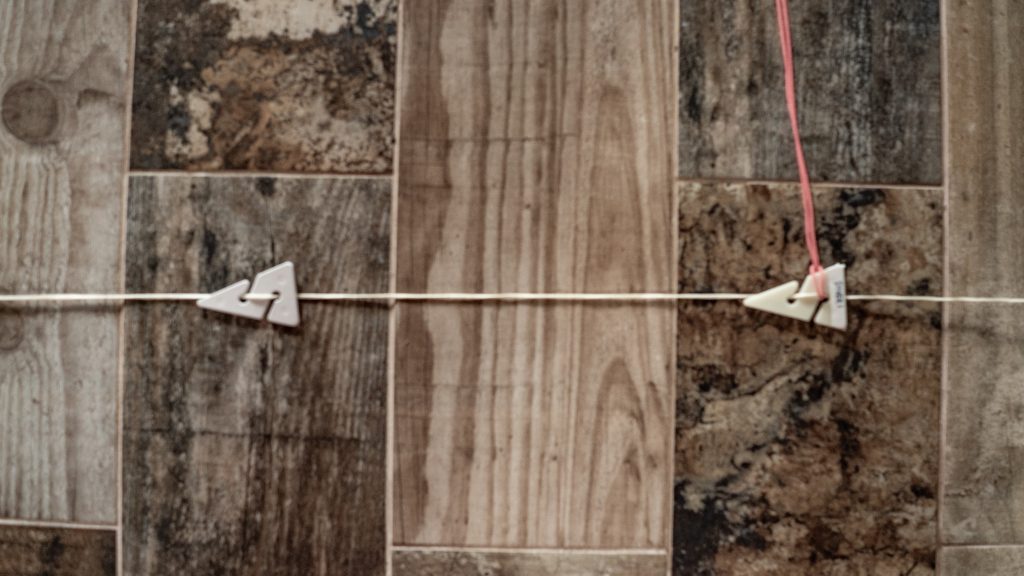
Three main types of personal markers are commonly used in Mexico cave diving, and many divers now 3D print or craft their own, very unique styles. The most common markers are Arrows, Cookies, and REMs (referencing exit markers). It’s important to consider directionality of personal markers and where in the cave they can be used.
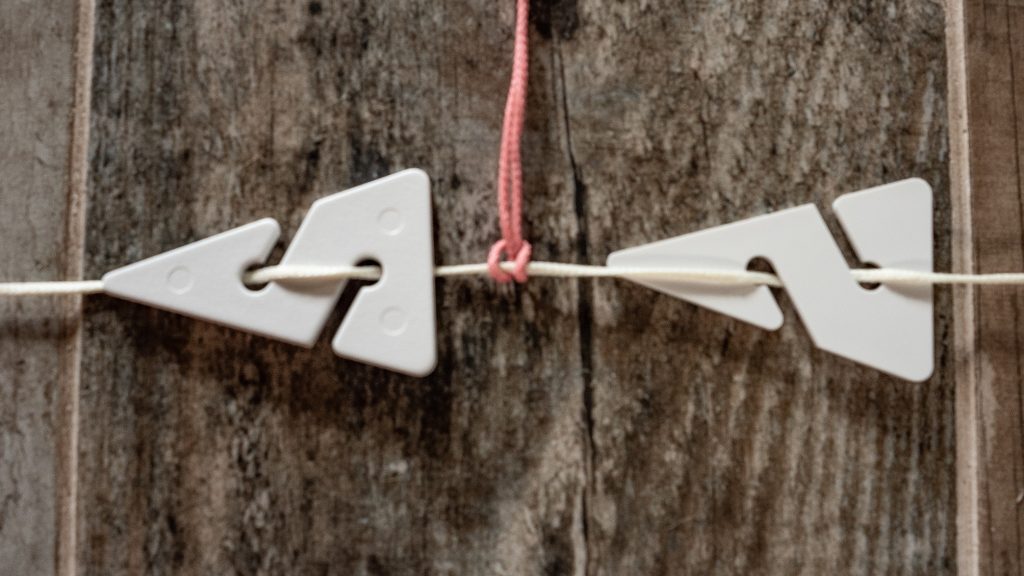
Arrows. Personal arrows are commonly used to anchor jump spools. However there are a few situations in which I feel that arrows should not be used. In accordance with Rule #2: don’t confuse other divers, it’s generally frowned upon to place personal arrows directly next to system/permanent arrows. A personal arrow, no matter how nicely marked, may look like a system marker to another, less observant dive team, and placing a personal arrow very close to a system marker may lead other divers to believe a double arrow is present. Remember, double arrows have a special significance in Mexico.
At jumps, placing a personal jump arrow within a few inches of a system arrow can make it look like a double arrow jump. Instead, the team should separate the personal jump arrows from system arrows by 0.5m/1.6 ft (if possible) to avoid confusion.
At T-intersections or directional changes, using a personal arrow to mark the team’s exit may confuse other teams, as it may look like a double arrow indicating a nearer exit. For these applications cookies or REMs are preferred.

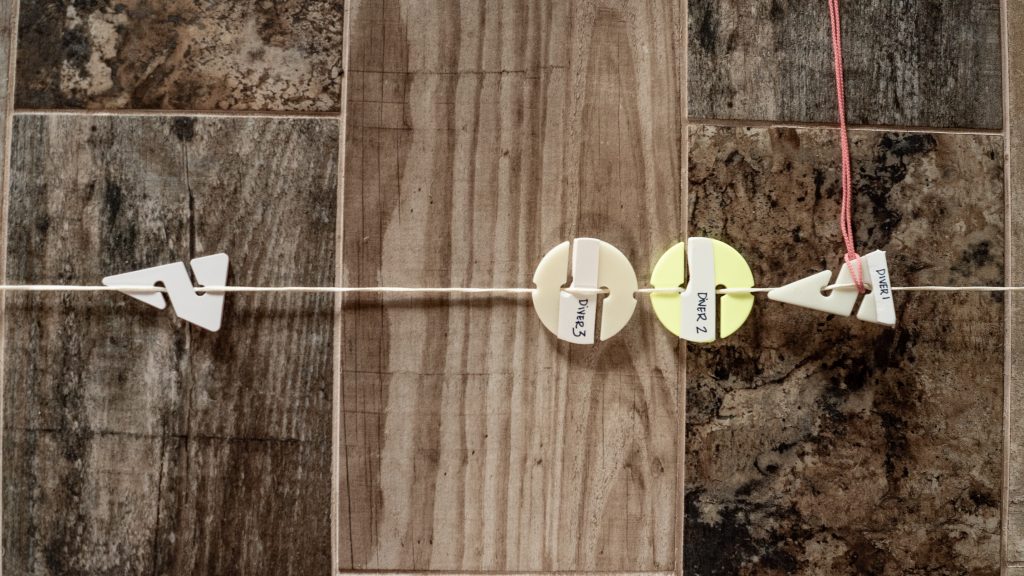
Cookies. Cookies were a Mexican cave diving innovation invented by explorer/instructor Daniel Riorden in the late 1990s, in accordance with Rule #2. Cookies are round, or non-directional, and are typically not used as system markers. The shape makes them clearly personal markers, which simplifies marking intersections and directional changes as all other cave teams know that a cookie indicates nothing about general cave navigation. Cookies may also be used to mark a cave team’s reels.
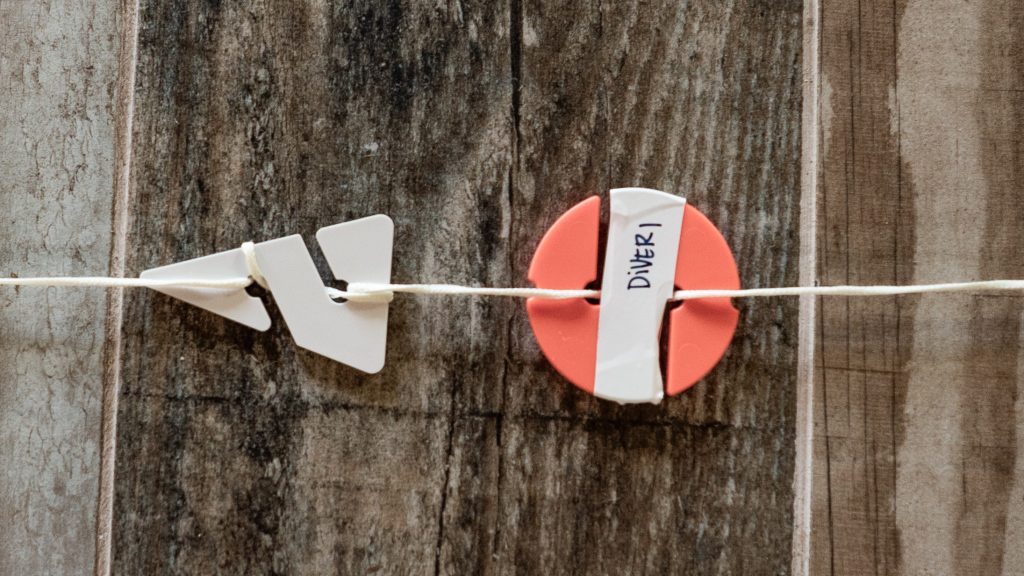
Cookies are appropriate for most uses, with the exception of anchoring jump reels or spools. It’s inappropriate to tie a reel or jump spool onto a lone cookie, as the cookie alone does not indicate a direction of exit at the intersection, a clear violation of Rule #1: Don’t Confuse Yourself or Your Team Mates.
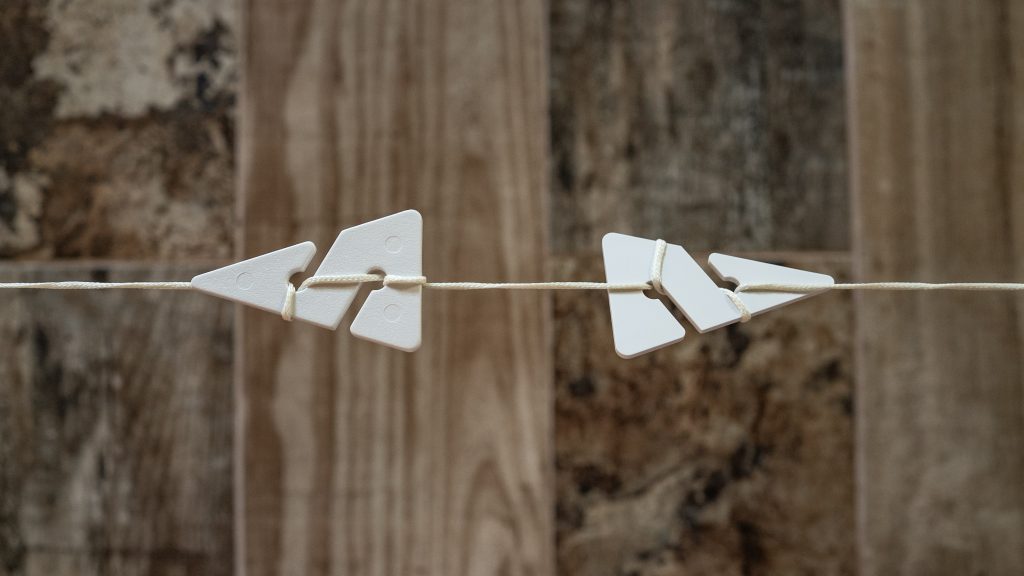
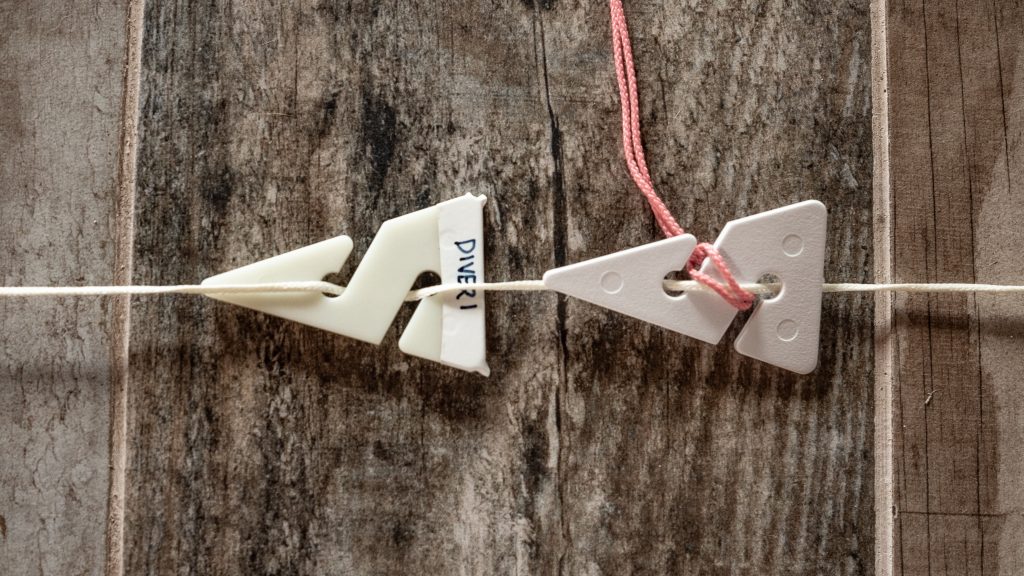
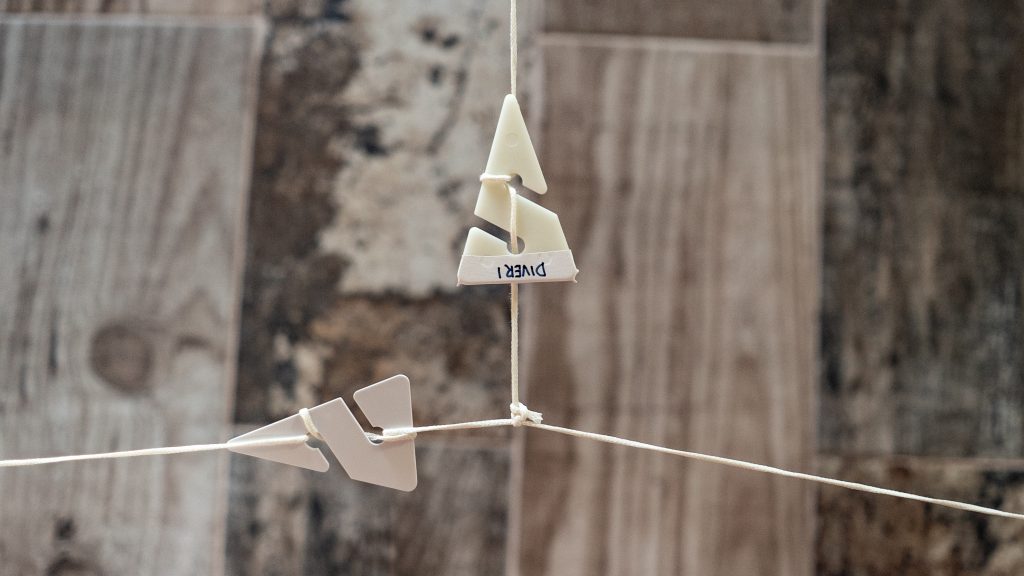
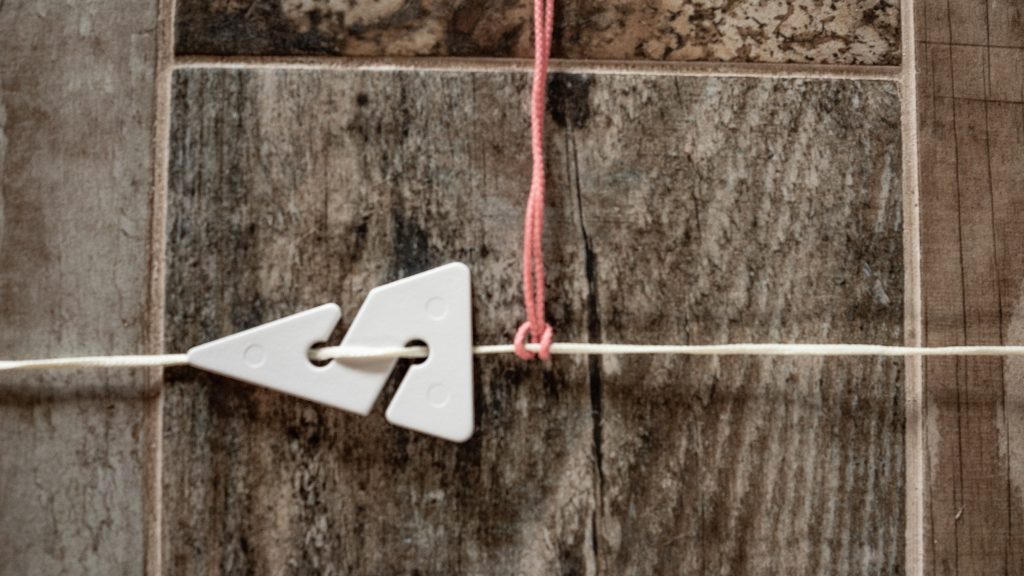
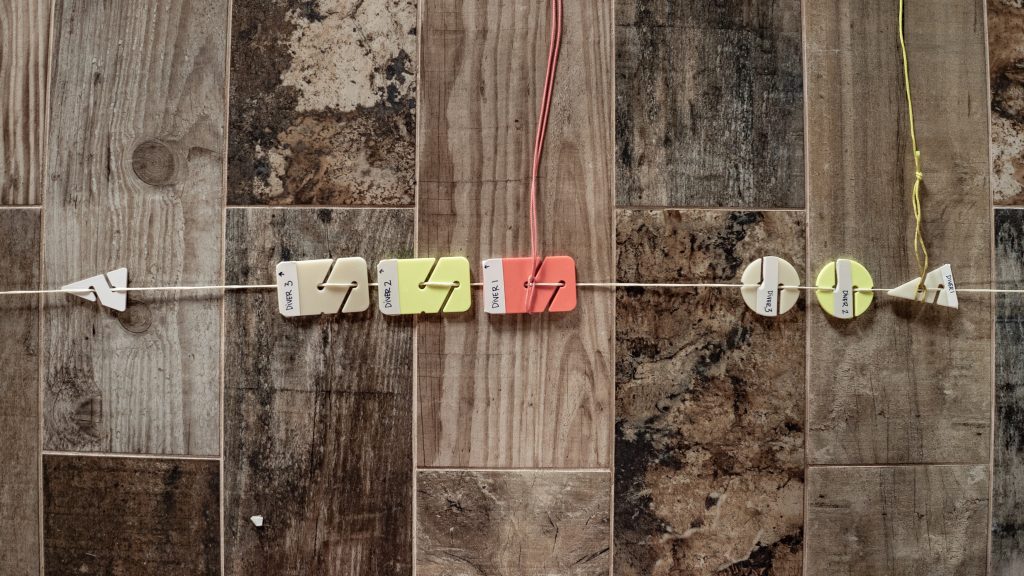
REMs. REMs (Referencing Exit Markers), invented by Bil Phillips, are a common sight in Mexico and uncommon in most other regions. They are rectangular markers, with slats for line attachment closer to one end. The longer end points towards the team exit.
REMs are interesting in that they are directional, but can not be confused with arrows. They can be used for the same functions as both arrows and cookies, eliminating the need for a diver to carry a variety of personal markers. In my conversations with Bil, he told me this was not his original intention for the markers, but he liked that people were getting creative with them.
REMs have one other useful feature, which is that the exit side of the marker has enough space to write a serious note. This can be left on the line for notes to a buddy or for personal notes, in place of wetnote pages or other methods.
Creating Your Personal Markers
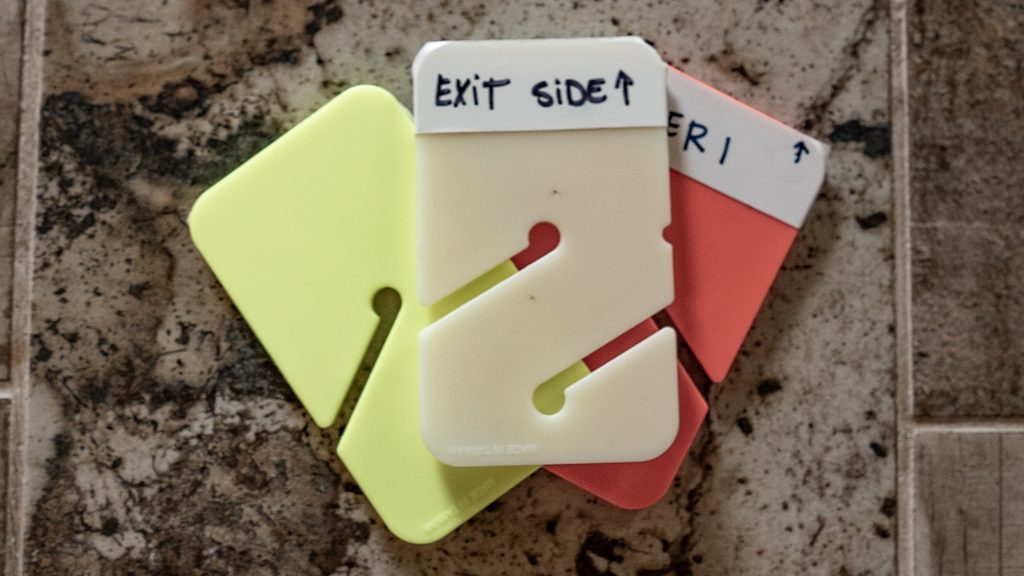
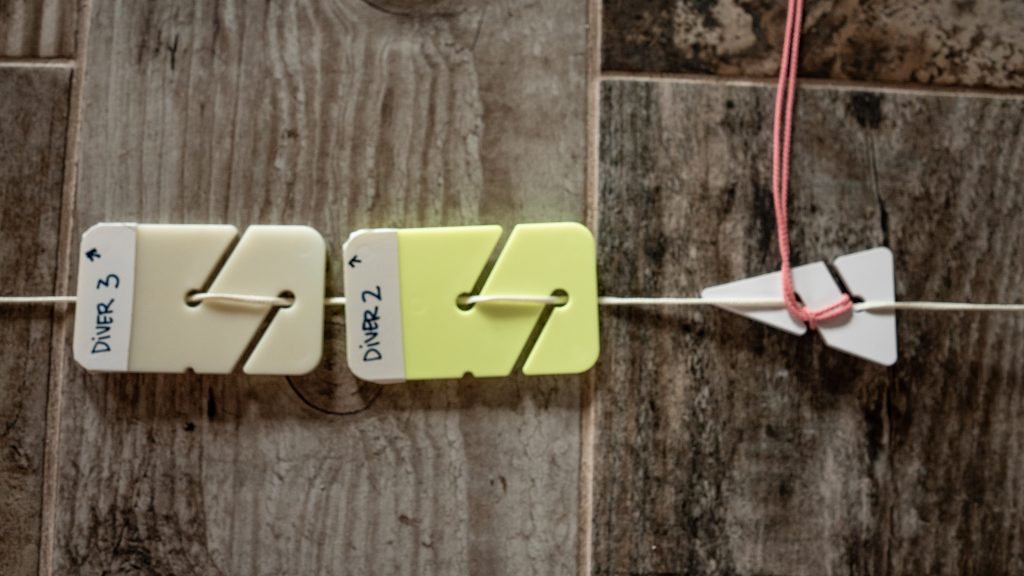
No matter what style of markers a diver chooses to use, their markers should be clearly personalized. All organizations teach divers to write their names, nicknames, or an identifying word on their personal markers to indicate who the marker belongs to. This helps to fulfill both Rule #1 and Rule #2, making the markers easy to identify.
An additional method of personalizing cave markers that I recommend is to make them touch contact identifiable. I ask my divers to modify their markers in a way to make them uniquely identifiable in zero visibility, such as cutting a corner off, punching holes in them, or adding something as simple as a cable tie in order to physically identify them if visibility is lost.
Many divers also like to number their markers, which allows divers to account for all markers and refer to a certain navigational decision in the debriefing or in their notes – for example, “the jump where the diver put down marker number three.”
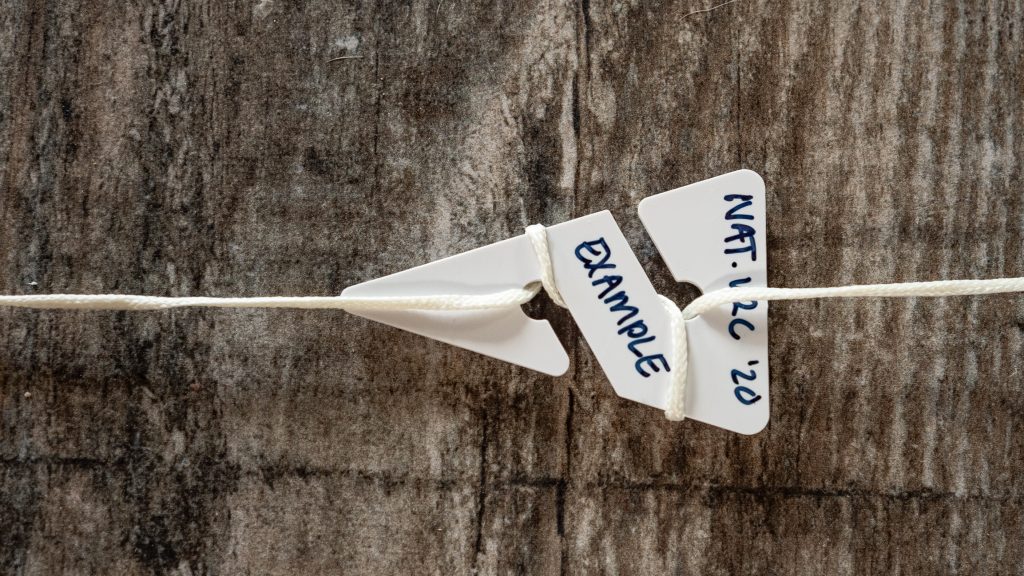
A word of caution here – it is possible that some system or permanent markers have a diver’s or dive team’s name on it. These are exploration markers. They typically have the team’s names, the date or year of the project, and maybe even a keyword or number written on them, and are not marked with touch or physical identification cues. Exploration markers are so much fun to find! Every time I run across a historic marker with an explorer’s name on it, I feel a kinship to the original explorers and imagine what the person must have felt like, being the first human in this cave. If a diver has a question about the cave, the presence of the explorer’s name indicates who to contact with questions.
Team vs Individual Markers
Now we are getting into the great debate! Which is better, team or individual markers?
When cave divers are using the team marker approach, the diver in the front of the team places all markers for the team, marking and placing jump lines, marking T’s, and placing any other markers that are deemed necessary. Other team members carefully observe the diver in front, and confirm that the markers are correctly placed. The advantage of this style of marking lines is that there are fewer markers on the line, and that it is slightly faster than having each diver personally mark intersections. UTD’s Andrew Georgitisis rather infamously premiered a REM-style “TEM (Team Exit Marker)” in a Facebook video last year advocating the use of team markers.
If a cave team uses the individual marker approach, each diver places a personal marker to mark the team’s exit at every point of navigation, including jumps, T’s, and directional changes. The advantages of this system are that each diver physically participates in the cave navigation, which helps to fix it in his or her memory. Additionally, more markers are easier to see, and add an additional degree of personalization to the navigation. If my team is using all REMs, and your team is using arrows and cookies, just the fact that a jump is marked with arrows and cookies means that it is not mine.
However, the most important argument for this method, is that individual markers create a level of redundancy in navigation. If a diver accidentally ties into a jump arrow that points away from the team’s exit (and no one notices), but the other divers mark the exit side of the intersection correctly with their cookies or REMs, it is clear that there is a navigational discrepancy upon exit. Divers then know to refer to their compasses and natural navigation clues to determine the correct direction to exit, instead of blindly following the arrow in the wrong direction when leaving the cave. This can be life saving. GUE uses this approach, though most training organizations do not state a preference.
Finally, some instructors teach that in an instance of team separation, divers leaving the cave remove their personal markers, while leaving the jump lines and other team member’s markers in place. This indicates to the team who is still in the cave, and who has made it out. This method of dealing with a team separation is debated in the cave community.
The advantages of individual markers as far as clarity, redundancy, and problem solving make the individual marker method my choice.
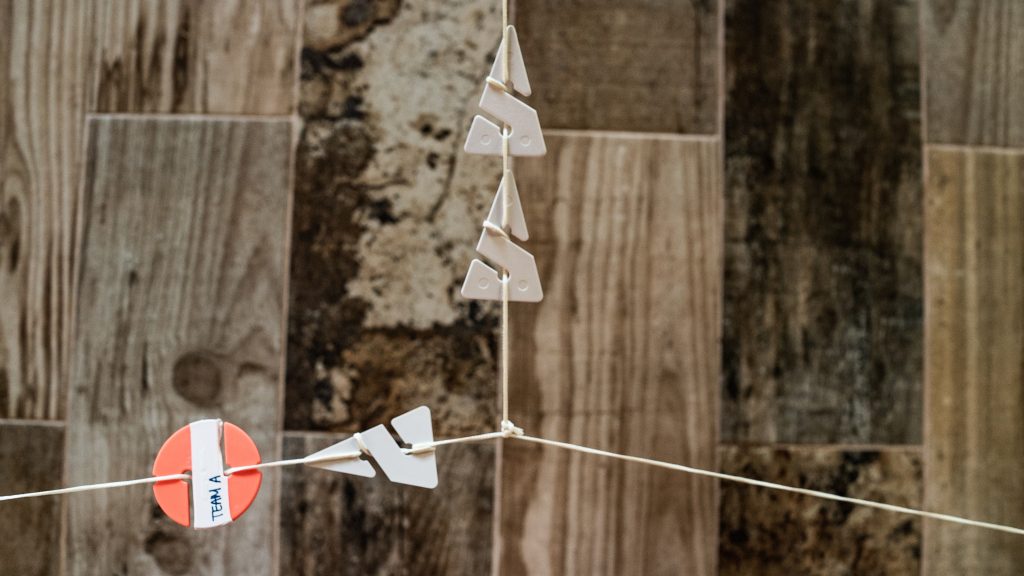
Presence Markers
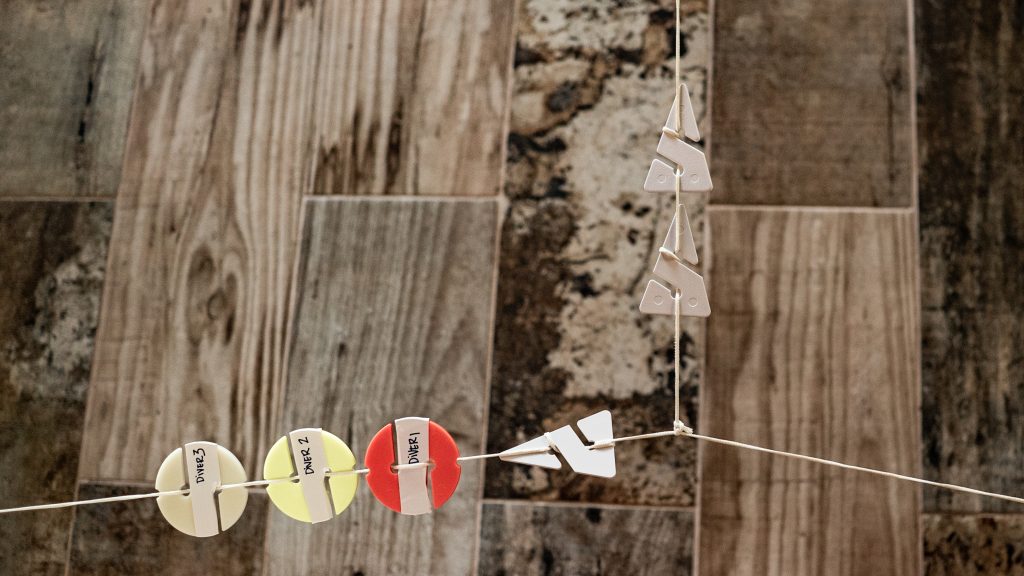
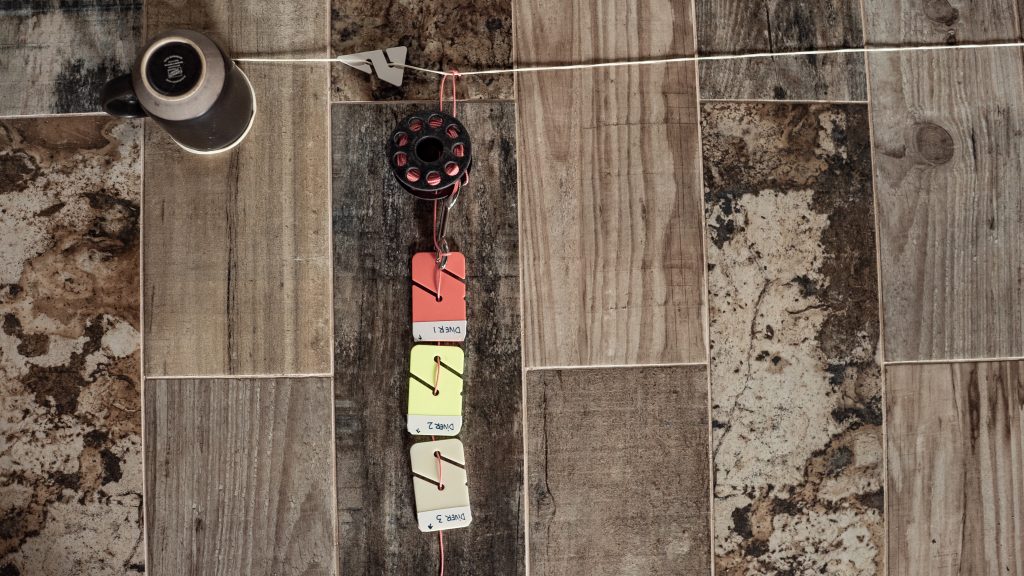
Presence markers are personal markers that are placed at the beginning of a cave line when the line starts in open water and no primary reel is required, or on the primary reel line when a reel is run from the open water. Presence markers can be team markers or individual markers, and indicate the presence of the team in the cave. When individual presence markers are used, they additionally indicate the number of divers in the cave.
If a team must exit in complete zero visibility all the way to the end of line in the open water, personalized presence markers allow the divers to confirm that they have navigated correctly to the open water and may safely surface. No agencies seem to have a firm stance on presence markers, nor is this an established local protocol in Mexico. However, I quite like presence markers and use them in my courses and personal diving.
Jump Protocols
When cave divers swim from the main cave line to a secondary line (jump line) in a side passage, they have made a jump. As all modern training organizations require cave divers to maintain a continuous guideline to the open water, the cave teams install a jump reel or spool to connect the mainline to the secondary line. This is a visual reference upon exit and allows the team to navigate out of the cave in zero visibility by touch.
How should a team install a jump line? Good question! Once again there are many options, and again, there is no “right” answer as long as the marking is clear to other divers, the team that installed the line, and has some sort of marker indicating the direction of exit. It’s helpful to use colored line on jump spools as opposed to white line, which is typically used for permanent cave lines, as this makes the temporary nature of the line obvious to other teams. Here is a non-exhaustive list of options.
Line to line connection. When a team loops a jump spool directly around the cave line (as opposed to tying the spool into a line marker), the jump is a line-to-line connection. This sort of navigation is more commonly observed in Florida and other locations where jumps are indicated by two arrows. The team can tie the jump spool between the two jump arrows without risk of the jump line sliding out of position. Using this method, two arrows are present (if they are pointing in the correct direction) to indicate the team’s direction of exit.
Line to line connections are less common in Mexico, because jumps are usually indicated by single arrows. The jump line can slide around without arrows blocking it on each side.
In Mexico, where jumps are indicated by a single arrow which may be pointing away from the team’s exit, this method is generally frowned upon. Lines that are not anchored by a line marker are likely to slide out of position, particularly in zero visibility.
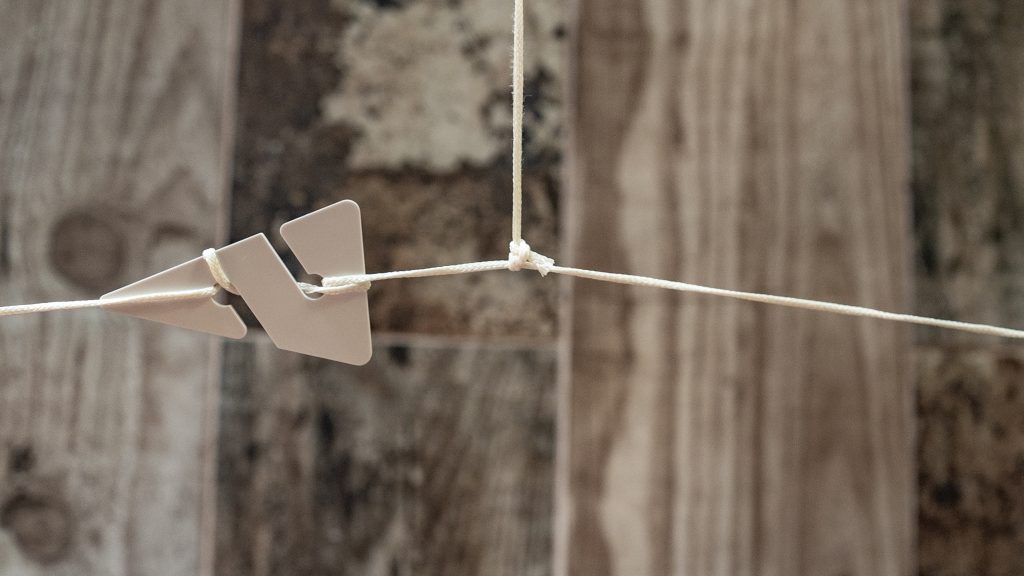
Jump from a system or permanent marker. One common method of installing a jump line in Mexico is to loop the jump spool’s line around the system arrow. This fixes the jump spool’s line in place and avoids the problems mentioned above. However, it is important that the team carefully observes the arrow’s direction. Divers should never attach a jump spool to an arrow that points away from the team’s exit. Doing so has been implicated in numerous fatalities, including several well-known accidents at Cenote Kalimba. If the team chooses to use individual markers, team members place cookies or REMs on the exit side of the intersection created by the mainline and jump line. Jumping from a system marker is not possible when the arrow has already been used by another team, or if the jump is unmarked, and it’s a terrible idea if the arrow points away from the team’s exit. Always be prepared to use the final jump method.

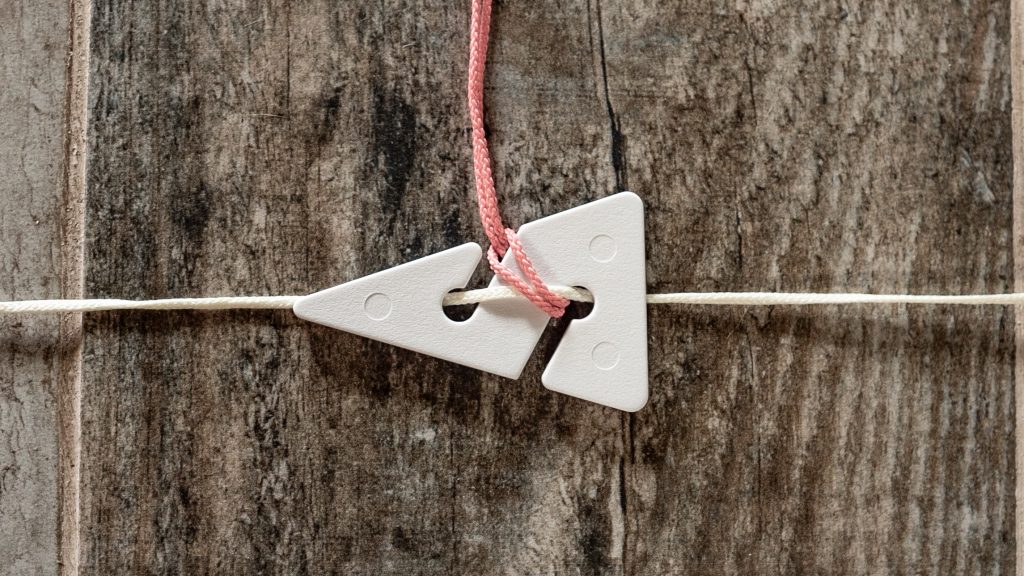
Jump from a personal marker. To jump from a personal marker, the team leader places an arrow or REM on the line indicating the team’s exit direction, and ties into the personal marker. If individual markers are used, each member of the team places a cookie or REM on the exit side of the intersection created by the jump spool line and the main line. Again, this can be used as standard protocol, in the case where the jump arrow is pointing away from the team’s exit, in the case where the arrow is already used by another team, or in the case where the jump is not marked by a system or permanent arrow. This is my preferred method because it avoids uncertainty, and I use the same exact protocol for every jump, regardless of what is present in the cave.
If a team chooses to jump from a personal marker when a system arrow is present, what side of the system arrow should the team jump from? I prefer to install my personal marker at least arm’s length away from the system arrow to differentiate my navigation from the system navigation. I like to jump from behind, or from the cave side of the direction the system arrow points, because this leaves the permanent marker on the exit side of my intersection, allowing other teams already in the cave who have noticed this arrow to have an unobstructed reference to the exit.
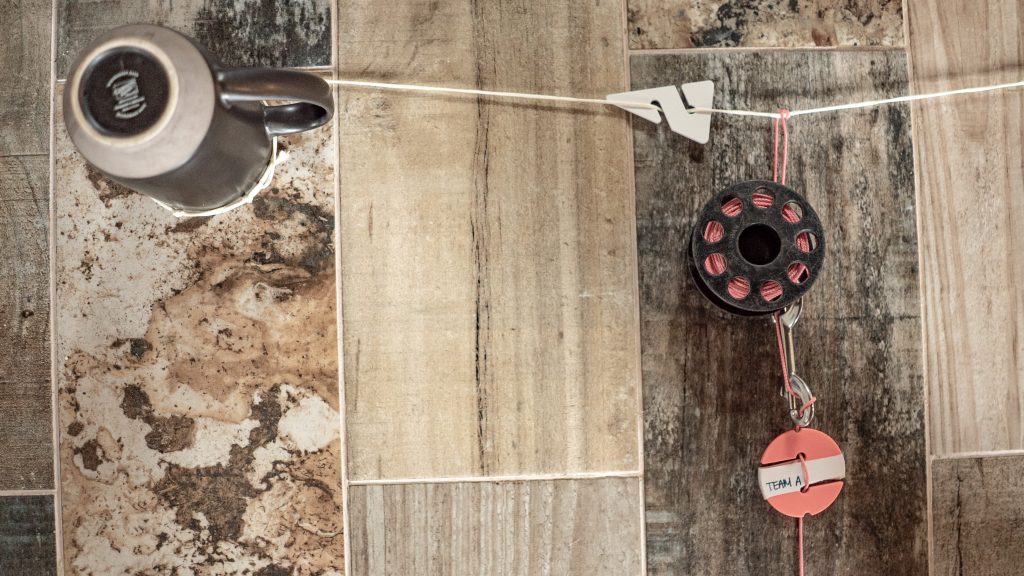
Marking Reels and Spools.
When tying into the main cave line or a jump line, many divers, myself included, like to place a marker on the reel or jump spool line. On a primary reel line, these markers serve as presence markers. The markers also help to visually and physically identify the diver’s line in zero visibility, especially in the event that there are multiple spools or reels tied into the cave line. Finally, this helps to unambiguously identify similar types of spools and reels, helping to avoid removing a different team’s reel or spool by mistake. Not everyone does this, and some consider it redundant and unnecessary, as realistically divers should be able to identify their own reel or spool. I feel like it is extra clear, so I like to mark my spools and reels.
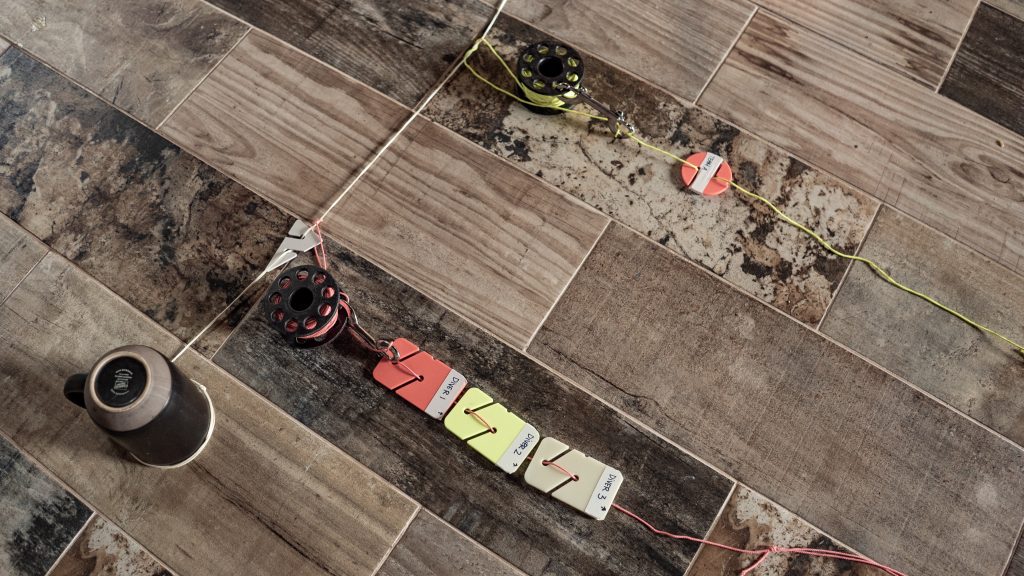
Navigating Around Multiple Cave Teams
A brief note is warranted to mention protocols for navigating when there are multiple teams in the cave. The general rule is to attach any spools or reels cave side of another team’s spools, unless there is a very large space exit side. The same rule applies to the placement of jump spools. When navigating a T, place your markers on the exit side of the other teams markers, so that their markers are the first encountered during the exit.
What’s the Number One Navigational Mistake I Should Avoid as a Tourist Cave Diver in Mexico?
The number one navigational mistake to avoid is to blindly follow arrows and lines to your death. Nearly every Mexican cave fatality I am aware of involves navigational errors exacerbated by camera use. Mistakes include divers jumping off system markers pointing away from their exit and subsequently going the wrong way when returning from their jump line, or teams getting turned around when taking photos. Mark all intersections methodically with personal markers, understand the overall compass heading of your planned dive, and be aware that arrows do not always point towards your team’s exit, or even an accessible exit. Notice if arrows change directions and mark them accordingly. In the event that you become confused, use your compass heading and natural navigation in conjunction with the cave lines to find your way home.
Mexico Cave Navigation Is an Art
Navigation in Mexican caves is subtle and often confusing. My shop teaches the system of navigation that we like the best, but there is a wide variety of protocols used in the area, and I wouldn’t say that any one way is necessarily incorrect. I am probably in the minority with this opinion, but I would say as long as you and your teammates stay oriented, and you don’t confuse other cave diving teams, have at it. No matter what you do, someone else is going to think you are wrong. Chin up. Did you confuse your team? Did you confuse other teams? No? Good enough.
In fact, I actually think it’s great that there are slight variations in the way people mark their lines. If I use REMs, and you use arrows, then I can easily and quickly identify my markers simply because they are different from yours. Nice!
One cannot be too strict with navigational protocols in Mexico, because while a team can have a standard way of placing and marking lines, the established lines in Mexico do not have standardized systems of marking. Maybe you like to anchor your jumps on personal markers behind the system markers? I do. But it’s not always possible based on the layout of the cave. You must adapt your navigation to the environment, and that’s why it’s an art! As unsettling as this is to many people, there are no absolutes.
So Many Options! What to Do?
Yes, it can be confusing, and determining your personal or team navigation style takes some thought and discussion within the dive team. There are options, and as grown up adults, you get to choose what is clearest and easiest for you. When evaluating a navigational method, just make sure it doesn’t violate the rules of safe cave navigation:
- Don’t confuse yourself or your team mates.
- Don’t confuse other divers.
Based on the previous discussion and general cave training organization guidelines, we can add two additional points.
- Maintain a continuous line to the open water using spools and reels as needed.
- Have a marker on the line indicating your direction of exit at key points of navigation, including jumps, T intersections, and directional changes.
In addition, I would urge dive teams to be consistent. Come up with a protocol, whether it’s team or individual markers, anchoring your line on system markers or personal markers, and use the same protocol on every dive. This makes in-water decision making easier and helps to avoid confusion. Review your navigational protocol with new team members, and agree to a protocol before entering the water the first time.
No matter what navigational procedure your team chooses to use, keep in mind that while important, plastic markers and the cave line are secondary navigational clues. Your first source of navigation is the cave itself: directionality, formations, physical features, and flow if it exists. Unlike lines, cave features are unlikely to be removed or changed. Learning to observe and read the cave will increase your safety and enjoyment!
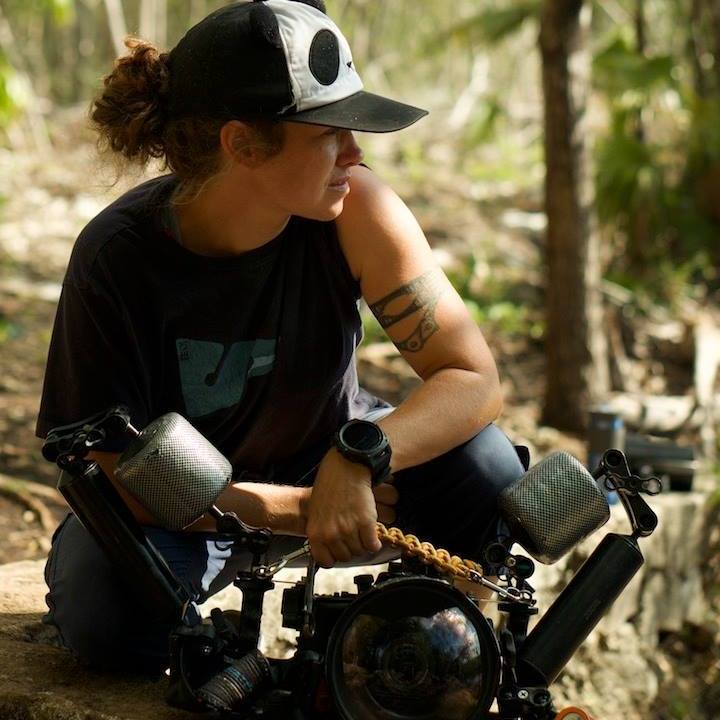
Natalie L Gibb’s passion in life is underwater cave exploration and conservation. With her exploration partner Vincent Rouquette-Cathala, she has led her team to discover over 20 previously unknown cave systems in Mexico’s Yucatan Peninsula, mapping more than 80 kilometers/nearly 50 miles of cave passageways. She is a public speaker, author, photographer, and videographer, and a member of the Woman Diver’s Hall of Fame. Natalie is co-owner of Under the Jungle, a cave diver training center in Mexico, and a TDI Full Cave Instructor.


Dial In Your DCS Risk with the Thalmann Algorithm

Deep Tunnel Workers Go Trimix

La Grande Dérive

California Dreamin’

British Invasion—Thailand Karst Edition 2024

Harnessing the Power of ‘Educated’ AI to Improve Diving Safety